WPLift is supported by its audience. When you purchase through links on our site, we may earn an affiliate commission.
PressProxy Review: Host WordPress on /blog with Any Store Builder
As someone who’s built multiple Shopify stores, I hit the same roadblock each time: the basic blog held me back.
I knew WordPress could fix my problems. The SEO tools and content features were perfect. But connecting it to my store looked too complex.
Then I found PressProxy. It runs WordPress right on my store’s /blog folder without custom coding or expensive developers.
In this hands-on review, I’ll show you how to add a WordPress blog to your Shopify store (or any store builder of your choice) without the technical hassle.
What is PressProxy? Overview and Key Features
PressProxy is a service that lets you run a WordPress blog on your store’s /blog subfolder, regardless of your platform. It handles all the technical integration through Cloudflare, turning what used to be days of development work into a 10-minute setup process.
The service bridges the gap between e-commerce platforms and WordPress, giving store owners the best of both worlds. Your store stays on your preferred platform while your blog gets all the SEO and content benefits of WordPress.
What makes PressProxy unique is its proxy-based approach. Instead of complex redirects or subdomain setups, it serves your WordPress blog directly from your main domain’s /blog folder – the optimal setup for SEO performance.
Key features:
- Loads WordPress blog directly on your store’s /blog folder
- Works with any e-commerce platform or site builder
- Complete WordPress admin access and customization
- Server-side caching and CDN integration for fast-loading
- Automatic SSL, daily backups, and security updates
Hands-On With PressProxy
In this section, I’ll walk you through the process of adding WordPress to your Shopify store/blog using PressProxy.
First, make sure you have all of the following:
- Active Shopify store with a custom domain
- Domain at a registrar (not Shopify)
- Cloudflare DNS hosting
- Cloudflare’s O2O feature is enabled (I’ll explain how to request this)
- PressProxy account (start with their free 7-day trial)
Expect to spend about 5-30 minutes going through the setup, depending on your experience.
Moving Your Domain From Shopify to a Registrar for Cloudflare
If your domain is currently managed by Shopify, the first step is to move it to a traditional domain registrar. Shopify isn’t a registrar itself, so you’ll need to transfer it out. Pick any registrar you like—Namecheap, Dynadot, GoDaddy, etc.
Switching to Cloudflare if You Manage Your Domain with a Registrar
First, sign up for a free Cloudflare account. Once inside, click “Add Site” and go for the free plan (it’s at the bottom of the list).
Cloudflare typically scans and pulls in your DNS records automatically, but it’s wise to double-check. Sometimes, it may create duplicate records. At this point, make sure all your DNS entries are set to DNS-only (disabled orange cloud).
If you’re using Shopify or Webflow, you’ll need to get O2O enabled for your domain. With other platforms, you can proceed as normal. Note: Request O2O before switching your nameservers. O2O is a Cloudflare feature not widely available yet, but you can get early access by shooting an email to Matthew Bullock (mbullock at cloudflare dot com). Below is a quick template for the email:

Once O2O is set up, head back to your Cloudflare dashboard to finish the process. Cloudflare will then provide new nameservers, like aryanna.ns.cloudflare.com and drake.ns.cloudflare.com. Go to your registrar’s dashboard, select the custom nameservers option, and enter the new Cloudflare ones.
Once O2O is set up, head back to your Cloudflare dashboard to finish the process. Cloudflare will then provide new nameservers, like aryanna.ns.cloudflare.com and drake.ns.cloudflare.com. Go to your registrar’s dashboard, select the custom nameservers option, and enter the new Cloudflare ones.
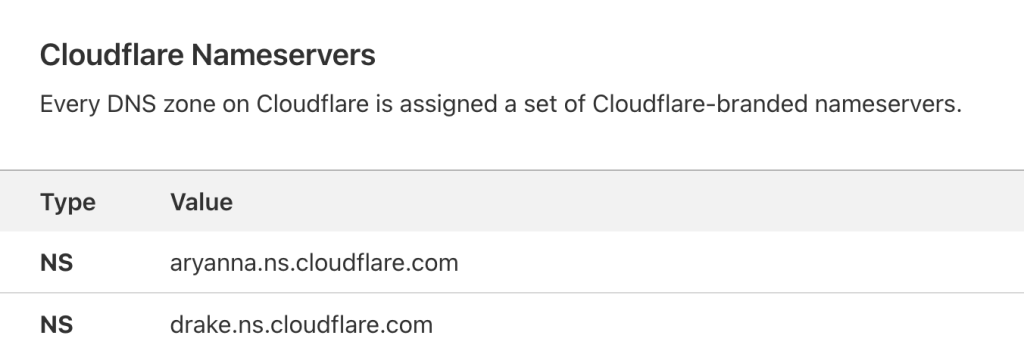
If you’re unsure how to change nameservers, just Google “how to update nameservers” along with your registrar’s name (e.g., “Namecheap change nameservers”). It usually takes anywhere from a few minutes to a few hours for the changes to take effect globally.
Activating Proxy on Cloudflare
Now that your DNS is running through Cloudflare and your store loads correctly, we need to adjust how traffic flows. Instead of going straight to Shopify, traffic will pass through Cloudflare first.
You’ll see your DNS records showing an A record and a CNAME record pointing to shops.myshopify.com. Here, you need to make some changes.

Change your root A record to a CNAME and point it to shops.myshopify.com (matching your www record). Turn on the orange cloud for both records. Here is what the result may look like, with your domain name appearing instead of @.

Wait about 5 minutes, then check your store loads correctly. These changes reroute your traffic the way PressProxy needs it.
Adding a New Blog on PressProxy
Now that your store’s running on Cloudflare, let’s add your blog through PressProxy. Grab a free trial with just your email—no credit card needed. The dashboard opens right up and shows you exactly what to do next. You’ll see a simple box for your blog URL (like “https://yourstore.com/blog“). Then pick what works for you: either use their pre-built WordPress setup to start fresh, or go with a blank slate if you’re moving over an existing blog.
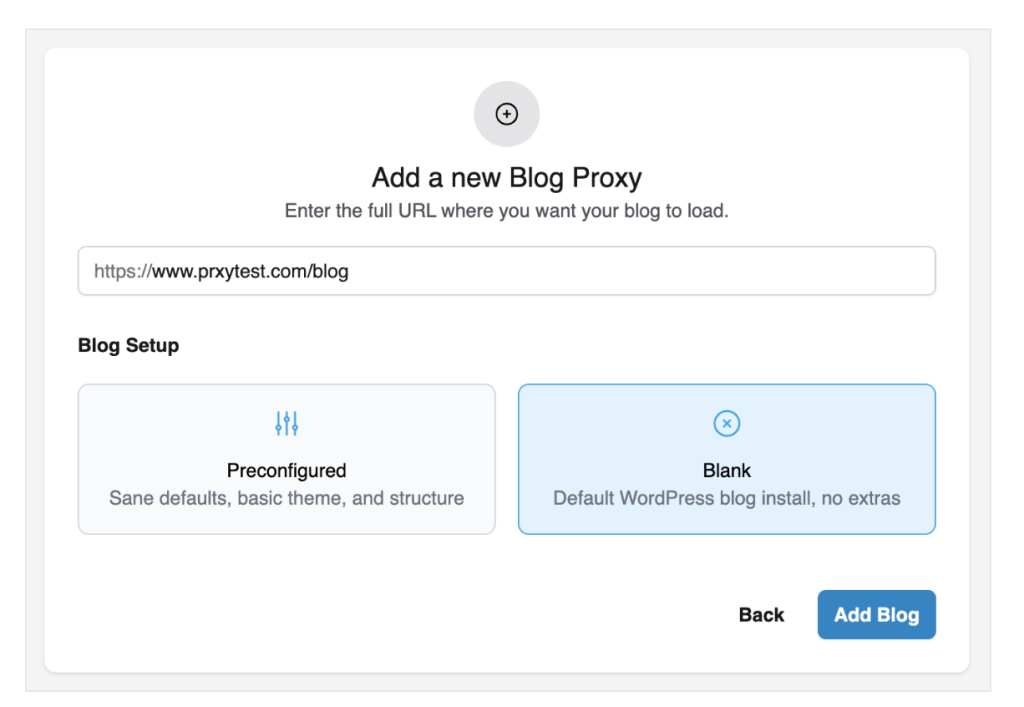
Next, create your Cloudflare API token through their link. All the permissions are already set—you just need to select your account and domain in the zone resource.
Give it a moment to verify, and then see your blog live.
Enjoying Your Blog
Look at that—your blog’s now running under /blog on your store!
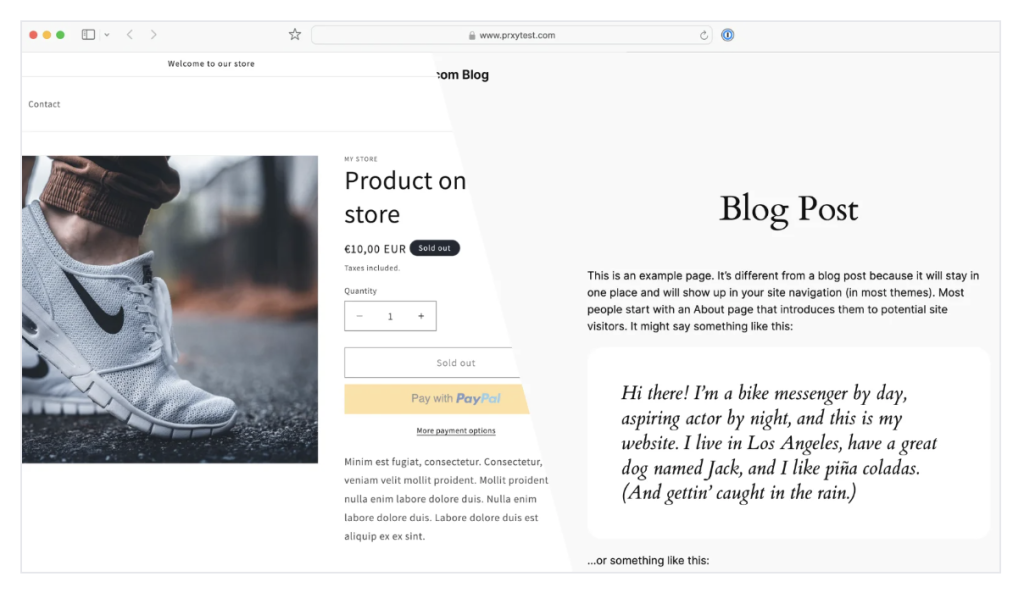
Head to your PressProxy dashboard and you’ll find a direct login button (just click it once to gain access). If you prefer the traditional way, your login details are there too.
Moving from an old WordPress blog to a subdomain? Install the Backup Migration plugin to transfer everything over. It’s a simple copy-and-paste process.
For all your published posts, make sure to set up redirects from the old URLs to their new homes. Check this tutorial by PressProxy for a complete walkthrough.
PressProxy Pricing
PressProxy offers three simple pricing plans, all with a 7-day free trial (as I mentioned earlier, no credit card is needed). Every plan includes managed WordPress hosting, daily backups, and support.
PressProxy plans:
- Blogger: $19/month for one blog with 10GB of space
- Webmaster: $49/month for three blogs with 30GB of space
- Agency: $99/month for ten blogs with 100GB of space
Need your site design to match your store’s look? They offer a design service for $149. Plus, you’re covered by a 30-day money-back guarantee if you’re not satisfied. Got questions or need help reverting your site? Just ask, and they’ll sort it out.
Final Verdict
There you have it—the steps to add a full WordPress blog to your e-commerce store.
With just Cloudflare and PressProxy, you can run WordPress directly on your main domain without the usual technical complexity.
Excited to take your store’s content to the next level?


