WPLift is supported by its audience. When you purchase through links on our site, we may earn an affiliate commission.
How to Move Your WordPress Site to A New Server
So, it finally happened. You’ve outgrown your existing web host and now it’s time to move your WordPress site to a new server.
Or perhaps you haven’t outgrown it at all. Maybe your current server is simply underperforming, creating a negative impact on your site speeds, uptime levels, and overall user experience. Or maybe you’ve just found a better deal elsewhere.
Whatever the case may be, migrating WordPress can be an intimidating task if you’ve never done it before.
That’s why we put this guide together.
Below, you’ll discover:
- How to prepare for a safe and successful migration
- Step-by-step instructions for moving WordPress to a new server
- The essential steps you need to take post-migration.
Ready? Let’s get started.
How to Prepare Your WordPress Migration – Recommended Best Practices
The key to successfully moving a WordPress site is to ensure it doesn’t affect your users. To do this, take some time before you start your migration to ensure you’ve completed all of the following tasks:
1. Select Your New Hosting Server
We’ve created this guide under the assumption that you’ve already picked out a new home for your WordPress site.
If that’s the case, skip ahead to Step 2.
However, if you don’t yet know exactly where you’ll be moving to, your first task is to figure that out.
See our recommended Managed WordPress hosting companies to get you started, but don’t stop there. After all, this is a major decision that can impact your entire business, and, as with all big decisions, it pays to do your due diligence.
As such, look for a hosting company that:
- Offers ample storage space capable of handling the size of your website.
- Guarantees enough bandwidth to handle the level of traffic you’re expecting.
- Has a good reputation among existing customers in terms of performance, security, and customer service.
- Is within your budget.
2. Review Your Themes and Plugins
With your new server ready and waiting for you, your next task is to log in to WordPress and look at your themes and plugins.
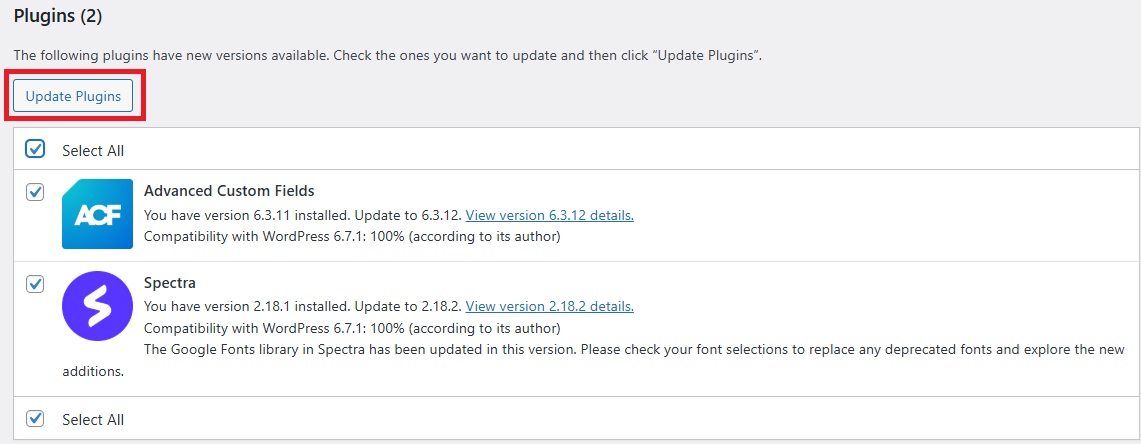
If any are out-of-date, update them to their latest versions. Plugin and theme compatibility problems are a significant cause of WordPress issues, so taking care of this quick and easy task now could save bigger problems down the line.
While you’re at it, take a moment to delete any themes or plugins that you’re either not currently using or don’t plan to use on your newly migrated site.
When you’re done, use a tool like Litespeed Cache to purge your WordPress cache. This will eliminate any unnecessary files and data, giving you a smoother, faster, and easier migration process.
3. Backup Your Site
Before you leave your WordPress dashboard, open up your backup tool and create a manual backup.
You do have a backup tool in place, don’t you?
If not, go ahead and pick one of our recommendations from our list of the top 8 WordPress backup plugins.

From there, back up a copy of your website and store that copy in at least two locations. These copies will act as a valuable safety net in case something goes wrong with the migration.
4. Confirm Domain Registrar Access
Can you imagine going to all the trouble of moving your site only to find that nobody can access it because you’ve lost the password to your domain account and can’t point the DNS settings to the new server?
It would be a disaster wouldn’t it? So, to prevent all the work you’re about to do from spiralling down the drain, make sure you have access to your domain registrar account.
If you’re changing your domain name as part of the migration, be sure to purchase and configure the new domain in advance.
5. Set a Performance Benchmark
Before you embark on your migration, use Google PageSpeed Insights, Pingdom, or a similar tool to get your website’s current performance scores.
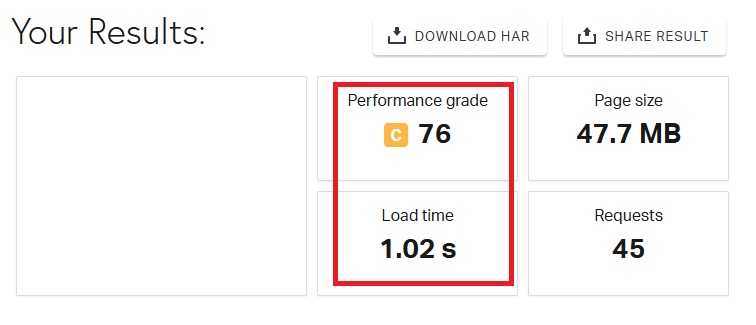
That way, when the migration is complete, you can test it again and see if your site performance is better or worse on the new server.
6. Set a Time to Migrate
If you follow the rest of our instructions to the letter, you’ll be able to successfully move your WordPress site with practically zero downtime.
Still, there’s always a slim chance that your post-migration testing and optimizations could have an impact on the way users experience your site. So, it pays to plan your big move for a time when as few people as possible will be accessing your site.
This may mean that you carry out your migration late in the evening or at the weekend, but this is better than running the risk of disrupting your business during its busiest periods.
Top 3 Options for Moving WordPress to a New Web Host
1. Check if Your New Hosting Provider Offers Free Migrations
By the very nature of their business model, web hosting companies want you to leave their competitors and switch over to them. To entice more website owners to do that, some will even offer to migrate your WordPress site over to their servers for you, free of charge.
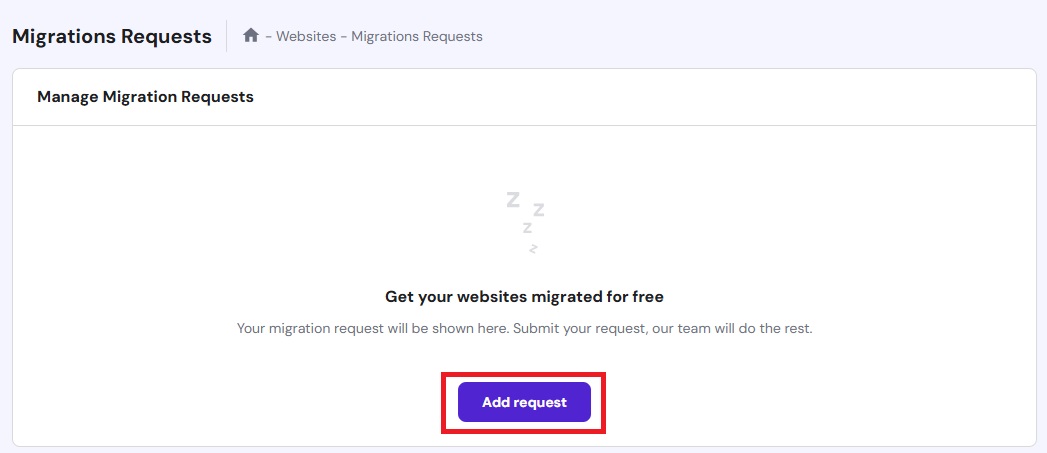
Some, like Hostinger and Dreamhost, for example, advertise this service. Others, however, don’t necessarily shout about it from the rooftops but will still do it if you ask nicely, so it’s always worth asking.
On the one hand, having your new hosting company migrate your site for you is by far the quickest and easiest option. On the other hand, you really have to trust that company not to mess things up, so this may not be the best approach if you want hands-on control and the ability to oversee the entire process.
2. Use FTP
Prefer to be in control and have enough technical knowledge to use File Transfer Protocol (FTP) clients like Filezilla or Cyberduck?
Then you can use this process to move your WordPress site.
To do this, you’ll first need to grab your FTP credentials from your current host, enter them into your FTP client, and then download all of your WordPress files.
Next, get the FTP credentials from your new hosting provider, connect to your server, and upload the files there.
Although this gives you full manual control without relying on third-party tools, it can also be a pretty time-consuming process, not to mention one that could be fraught with errors if you’re not completely confident in your FTP skills.
3. Use a WordPress Migration Plugin
Using a WordPress migration plugin offers a happy medium for those who aren’t familiar with FTP but don’t want to hand off the entire migration process to a third party.
Tools like UpDraftPlus, Duplicator, and All-in-One WP Migration automate the process, taking care of everything from exporting your files and database to uploading them to your new server. Ultimately, this saves you a whole heap of time and trouble while still keeping you firmly in the driver’s seat.
If you’re not sure which tool to use, here’s our six recommended WordPress migration plugins.
How to Carry Out a WordPress Migration With Duplicator: Step-by-Step Instructions
Since plugins are the easiest, non-technical way to move your WordPress site, that’s the method we’ll focus on in this tutorial.
While there’s a number of top migration tools available, we’ll be using Duplicator for our example. If you choose to use a different plugin, note that while the interface may look different and the specific steps may vary, the overall process remains the same no matter which plugin you use.
1. Install Duplicator on Your Current Site
To begin, log in to WordPress and head to Plugins – Add New. From there, you can install and activate the Duplicator plugin.
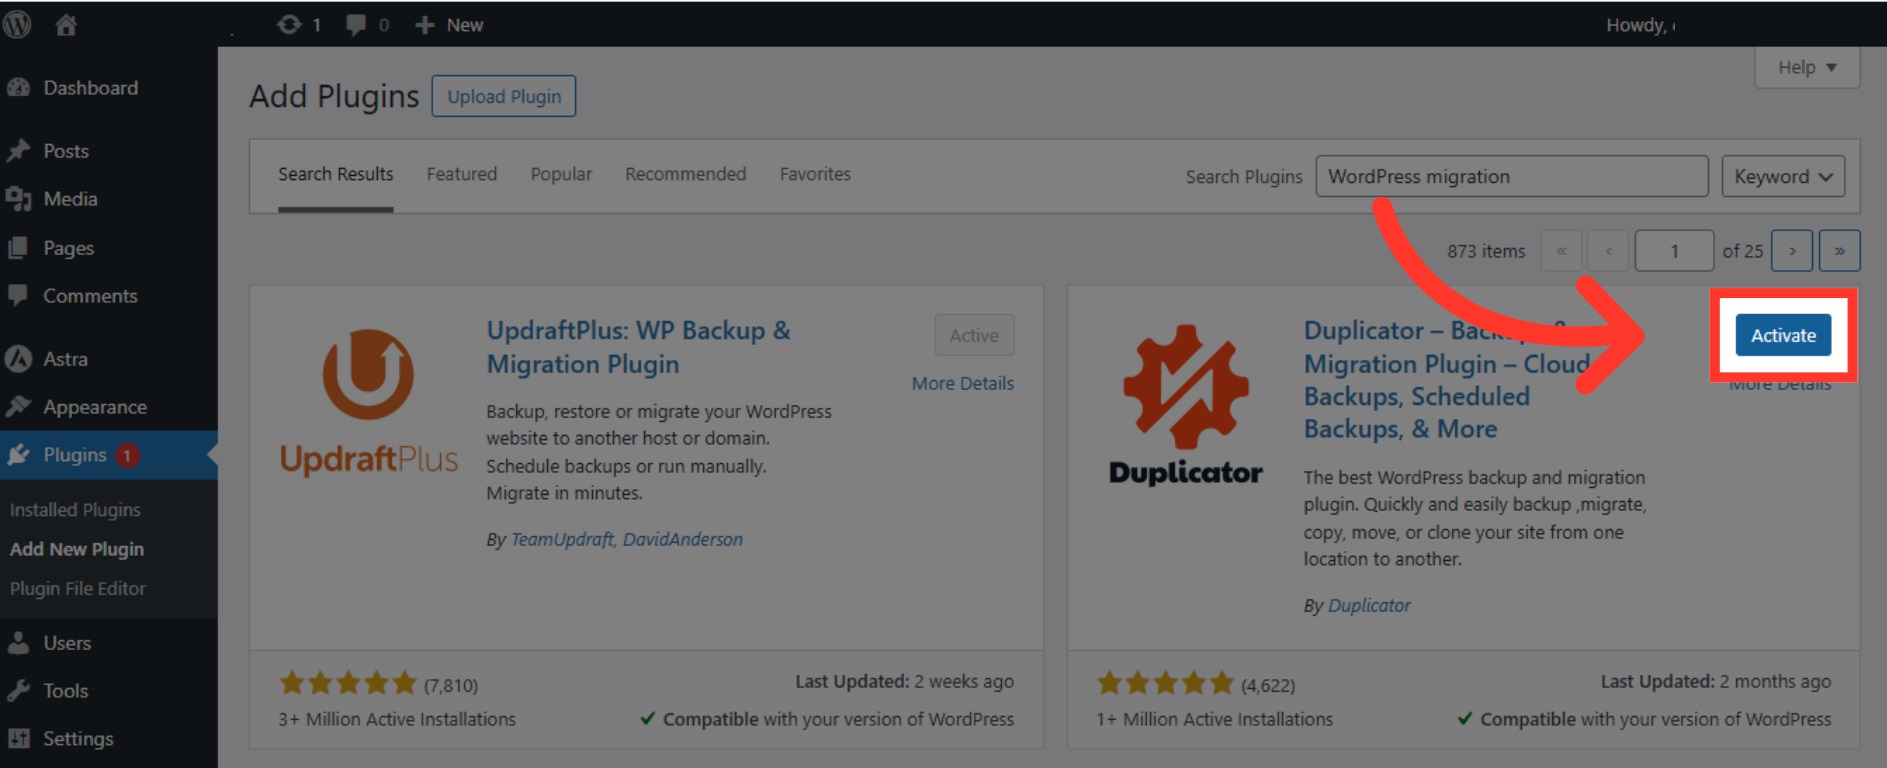
While the free version does a reasonably good job, we recommend using the premium Duplicator Pro to fully take advantage of features such as back-up exports to third-party storage platforms like Google Drive or Amazon Web Services.
2. Create a Backup Copy of Your Site
Activating the Duplicator plugin should take you directly to its dashboard. If it doesn’t, you can access it by selecting Duplicator from your main WordPress menu.

However you get there, begin the process by clicking Create New to start the backup process.
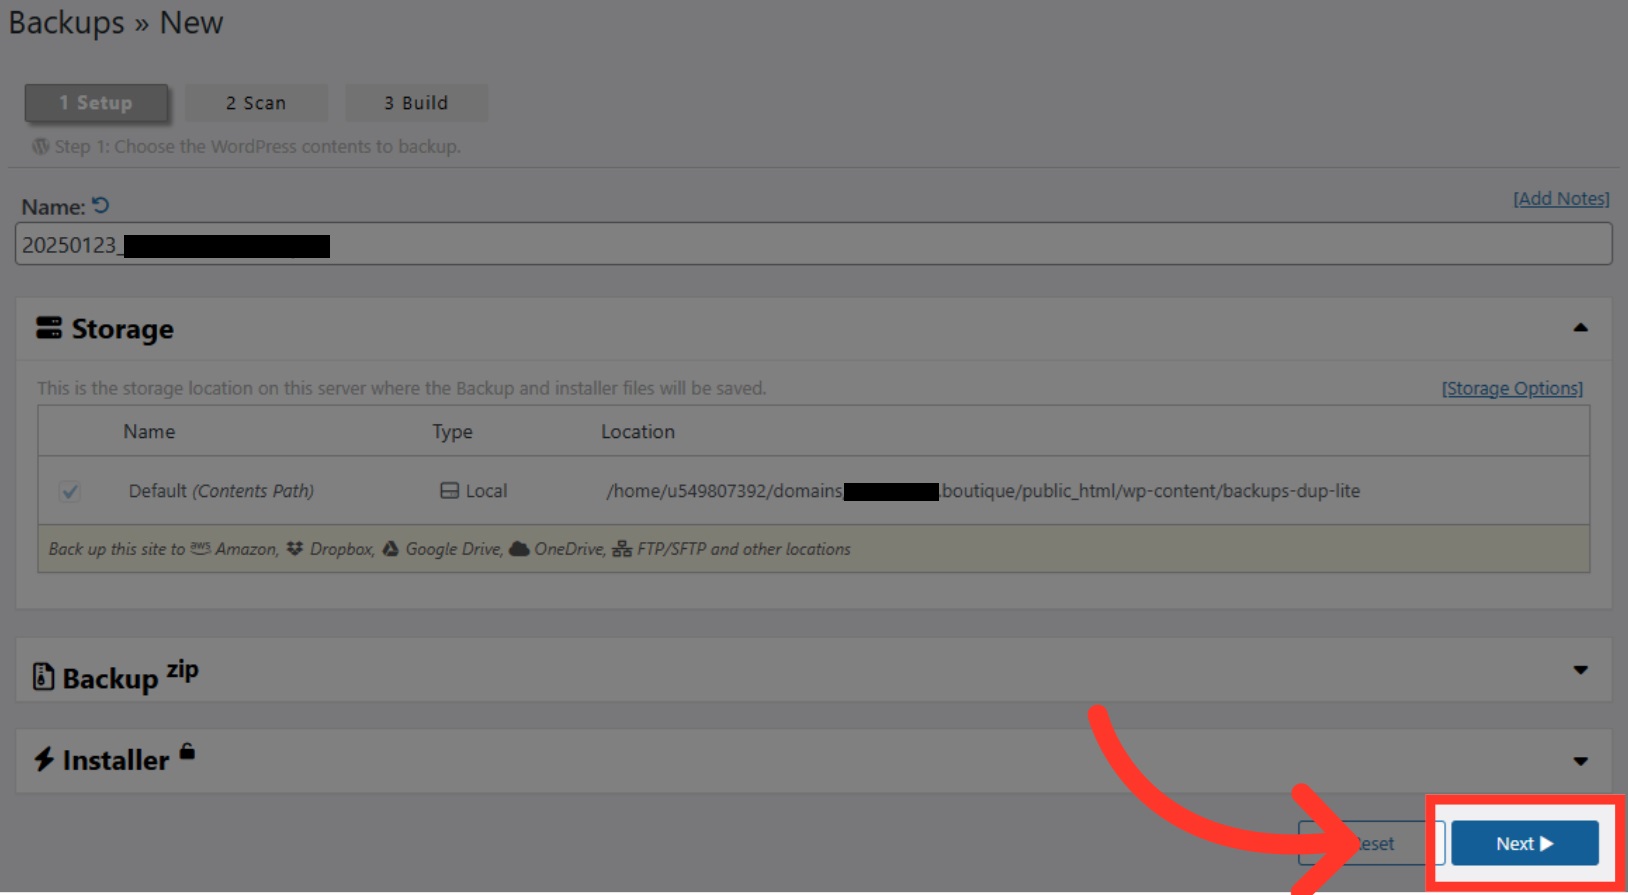
On the next screen, give your backup a name and click Next.
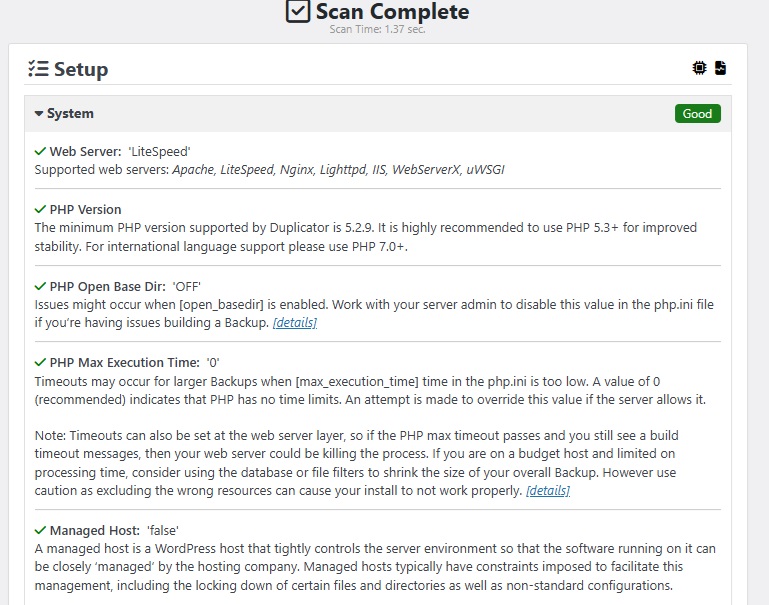
The Next button triggers a scan of your WordPress, checking to ensure that everything is good to go before you migrate.
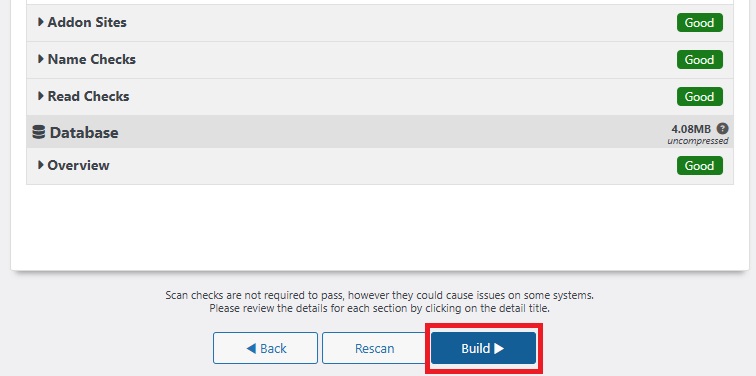
If this scan flags any issues, take care of those first. If everything looks good, go ahead and tap Build.
2. Download Your Backup
Duplicator takes a few moments to build a backup copy of your website.
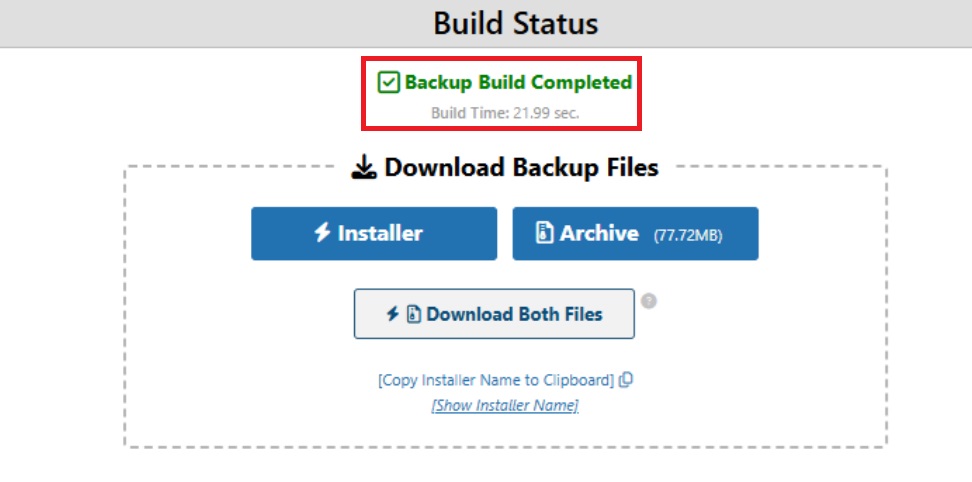
You’ll know it’s done when the Build Status page says Backup Build Complete.
This page also gives you multiple options for downloading your backup files. You can either:
- Download the Installer file, or;
- Download your archive, or;
- Download both files.
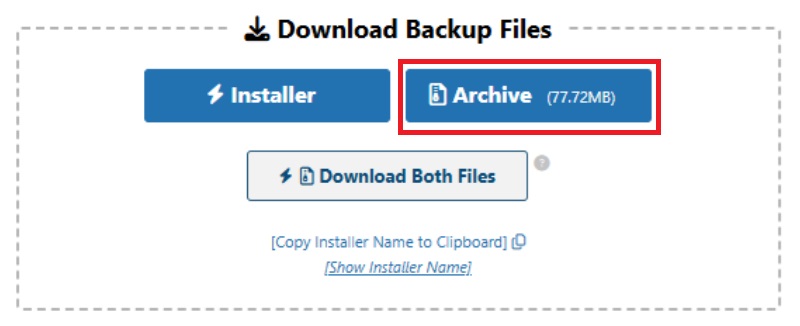
For the sake of keeping things as simple as possible, simply click Archive. This will download a copy of all your site’s files and data.
4. Create a New WordPress Instance on Your New Server
Next, go to your new web hosting account and install WordPress.
This isn’t the time to connect your new site to your domain name. Doing so may cause problems if users type in your web address and end up at a blank website.
Instead, install the site on a temporary domain name.
When your new site is ready, go to Plugins – Add New and install Duplicator.
5. Upload Your Backup Copy
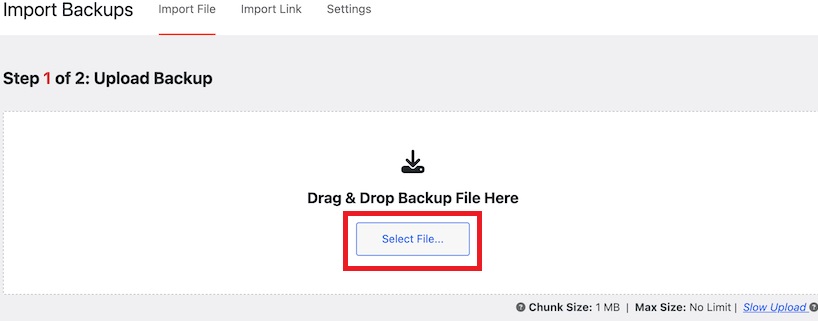
Remaining on your new site, go to Duplicator – Import Backups and upload the file you just downloaded from your old site.
Check that everything looks correct, then click Continue, followed by Launch Installer.
Once on the Installer page, select Full Install Single Site then Validate.
The Duplicator Validator will confirm that the system is ready to install your backup, at which point, you can click Next.
Reinally, review the Installation settings one last time, then tap OK.
Duplicator will then get to work importing all your posts, pages, plugins, and files into your brand new WordPress site.
With that done, you’ve successfully moved WordPress to a new server, but don’t celebrate too early, there’s still work to be done.
Post-Migration Checklist
With the actual migration part of your WordPress move complete, your final task is to run through the following post-migration checklist.
This will ensure that everything is functioning correctly and that visitors can access and engage with your site just as they did before the move, if not better.
1. Did Everything Migrate?
Go through your site and check that everything’s there.
- Did all your posts and pages migrate successfully?
- Did all your media files get moved over and, if so, are they displayed correctly on your site?
- Did all your plugins and theme files make it across?
If anything’s missing, you may need to go back to your old site and copy them across one-by-one.
2. Does Everything Work Correctly?
Next, test your site’s functionality.
- Are your contact forms working?
- Does your checkout process work as normal?
- What about buttons, hyperlinks, maps and other interactive features?
If you encounter any issues, our guide to solving common WordPress problems may have the solutions you’re looking for.
3. How is Performance Affected?
Hopefully, you’ll have taken a moment to test your site’s performance on the old server before you moved it.
Assuming you’ve done that, use the same tool to test performance on the new server.
If it’s improved, that’s great news.
If it’s more or less the same, that’s pretty good too.
However, if it’s noticeably worse, be sure to correct those performance issues and speed up your WordPress site speed before sending visitors to the newly-migrated site.
4. Is Your Domain Connected?
If you’ve done everything in order, you should be answering ‘no’ to this question at first. Your domain shouldn’t direct visitors to the new server until you’re 100% confident that everything is in place and working correctly.
Then, when you’re ready, log into your hosting company and replace the temporary domain name with your actual domain name.
For this process to work properly, you’ll also need to log into your domain registrar account and update your nameservers.
The exact steps for this process vary from provider to provider, so if you’re not sure where to start, contact their customer support or explore their help files for guided instructions.
How to Move Your WordPress Site to a New Server: Key Takeaways
Congratulations, you’ve now completed all the steps necessary to safely and successfully move your WordPress site to a new server.
Sure, it seemed intimidating at first, but as you’ve now learned, migrating WordPress can be a fairly straightforward process as long as you remember to:
- Prepare in Advance – Remove unnecessary themes and plugins, create a backup, and don’t forget to schedule your migration for those off-peak hours when the smallest number of visitors are likely to be affected.
- Choose your preferred migration method – Getting your new hosting company to handle the migration for you is the easiest method. FTP is the most technically-challenging but gives you full manual control. Using a WordPress plugin like Duplicator Pro offers a happy medium, letting you take the reins even if you have limited technical knowledge.
- Test Everything – Check for missing pieces, ensure all your interactive elements are functioning correctly, and don’t forget to test site performance both pre and post migration so that you can identify the impact of your move.
- Only connect your domain at the very end of the process – After all that effort, the last thing you want is for visitors to land on a site that’s slow as molasses or doesn’t work properly. As such, only connect the domain name and update your name servers when you’re confident your move was 100% successful.
Looking for more ways to keep your WordPress site at its very best? Check out these WordPress maintenance tasks you should be doing every day.