WPLift is supported by its audience. When you purchase through links on our site, we may earn an affiliate commission.
How to Integrate Laravel into WordPress: A Step-by-Step Guide
By themselves, Laravel and WordPress stand alone as solid and highly versatile tools for building websites and applications.
Bring them together, and the result is a mighty powerhouse that combines the user-friendliness of a world-class content management system of a Content Management System with the strength and scalability of a powerful PHP framework.
In this guide, we’ll talk you through the simple steps needed to integrate Laravel into WordPress and explore why you’d want to in the first place.
Read on to learn:
- How a WP-Laravel combination benefits both website and application developers alike
- How to prepare for a successful integration
- How to move WordPress WordPress’s PHP architecture to Laravel.
Ready? Let’s get started:
Why Use WordPress With Laravel?
By default, WordPress runs on a procedural PHP structure, meaning most of its functionality is built around individual functions, global variables, and hooks. On the one hand, this makes it incredibly flexible and easy to customize.
On the other, using it means you lose out on the structured, modern approach of a true PHP framework and all the benefits it brings.
That’s where Laravel comes in, providing a solid set of features that you just don’t get with a traditional WordPress instance. This includes:
- Clean MVC (Model-View-Controller) architecture – This helps organize and streamline application development by separating logic, data, and presentation into distinct components.
As a result, the application you’re working on is much easier to manage, maintain, and scale.
- Enhanced database management – Eloquent is an advanced ORM (Object-Relational Mapper) that comes as part of Laravel and can prove invaluable for simplifying database queries, giving you a more intuitive approach to the way you interact with your database.
This not only saves you plenty of time but can also be worth its weight in gold in terms of the number of potential errors it eliminates.
- Command Line Interface (CLI) – A useful tool that can be used to automate routine WordPress maintenance tasks such as emptying caches or carrying out database migrations. If you’re finding that maintaining your WordPress site takes up far too much of your time, you’ll no doubt appreciate what a difference this could make.
What’s more, Laravel also comes packed with a bounty of advanced security features, such as:
- CSRF protection -Ensures that attackers can’t trick your site into performing actions on behalf of other users without their consent. For example, say a hacker tries to manipulate your site into changing the password for a registered user so that they can gain access. CSRF protection prevents that request from being executed unless it’s validated by the legitimate user.
- XSS protection – Defends your site against cross-site scripting (XSS) attacks where malicious scripts are injected into your site, putting your site at risk of a data breach. You can learn more about XSS attacks in our comprehensive guide to WordPress security.
- Encrypted passwords – Even if bad actors break into your database, password encryption means they won’t be able to steal or utilize login credentials.
- Middleware – Allows you to filter incoming requests and take action before those requests affect your app or website. For example, it gives you the opportunity to check for malicious activity or authentic requests, ensuring only genuine ones are processed.
These features are absent from the WordPress core, so integrating Laravel allows you to access all of them without relying on resource-draining plugins.
Need a few more reasons to convince you to integrate? How about:
Maximize Theme and Template Customization
Laravel has a Blade templating engine that simplifies HTML and PHP integration and can be a game-changer for the way you create custom WordPress templates.
Building sites for high-value clients who want something more than another run-of-the-mill WordPress theme? The blading engine gives you what you need to create bespoke templates with absolute control over every aspect of layout, structure, and design.
Do More With APIs
The WordPress REST API may have its upsides (namely built-in accessibility and ease of use), but it’s not without its drawbacks.
Chief among its weaknesses is a capped number of endpoints and limited flexibility when it comes to custom data structures.
Utilize Laravel, and you unlock its versatile API development framework that gives you the freedom to create all the custom endpoints you need.
By doing so, you essentially upgrade your WordPress install, giving you greater control over data and third-party integrations.
Before You Integrate: 3 Key Preparation Tasks
Integrating WordPress with a new PHP framework isn’t a task for the faint-hearted. Although we’ve made the process as simple as possible in our six-step tutorial below, it’s still a big task with a lot of potential for things to go wrong.
With that in mind, prepare yourself by carrying out these three essential tasks:
1. Get to know Laravel
If you’re not already incredibly familiar with Laravel, now’s the time to learn. Although it’s as intuitive as any high-level development platform could be, it’s still a big step up from using the default WordPress interface.
The good news is that there’s a ton of official Laravel documentation you can go through, as well as an active subreddit (r/laravel), both of which are excellent learning sources.
2. Backup Your WordPress Site
There are a million and one good reasons to back your WordPress site, not least of which is that you can essentially reboot your site if a major change like the one you’re about to make causes significant problems.
Should the absolute worst happen, backing up your site ensures that you’ve always got a fully functioning copy of your site ready to be restored.
Need a hand with this step?
Read our ultimate guide to backing up your WordPress site for all the help you could need.
3. Work in a Staging Environment
Even with the safety net of a backup copy in place, you still don’t want to take your chances by carrying out the Laravel integration on the live version of your website.
After all, what would happen if you misconfigured something that caused key features like your contact forms or security plugins to malfunction?
What if the very process of installing Laravel causes havoc with your web server and plunges your site into major downtime?
While that most likely won’t happen, it’s hardly worth the risk. So, create a staging environment where you can install, configure, and test your new integration without it affecting your live site and -more importantly- the people who use it.
When you’re confident everything is a success, you can then migrate that fully Laravel-optimized WordPress site over to the live environment and begin enjoying its multiple advantages.
How to Integrate Laravel into WordPress: Step-by-Step Guide
All told, there are three main ways to combine the power of Laravel with the flexibility and CMS features of WordPress.
You could install the two separately and link them with APIs. You could start with Laravel as your core and then embed WordPress.
Or, you could choose the third option, which is the one we’ll be focusing on in this tutorial:
Start with an existing WordPress installation and integrate Laravel into it.
1. Install WordPress
If you haven’t already done so, create a new WordPress installation.
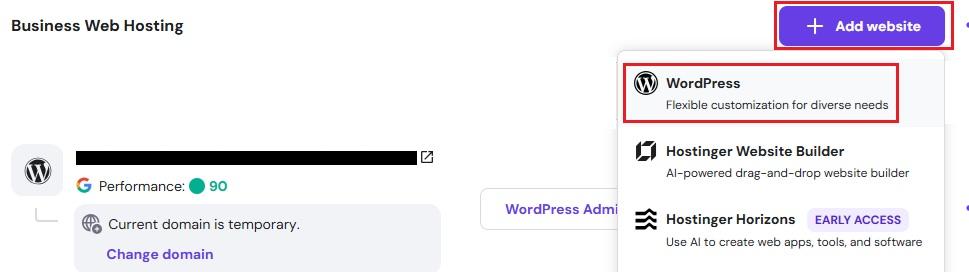
Depending on which hosting company you’re with, you may be able to do this via their one-click WordPress install feature.
2. Create Your Laravel Subdirectory
Next, create a folder within your route directory and call it Laravel.
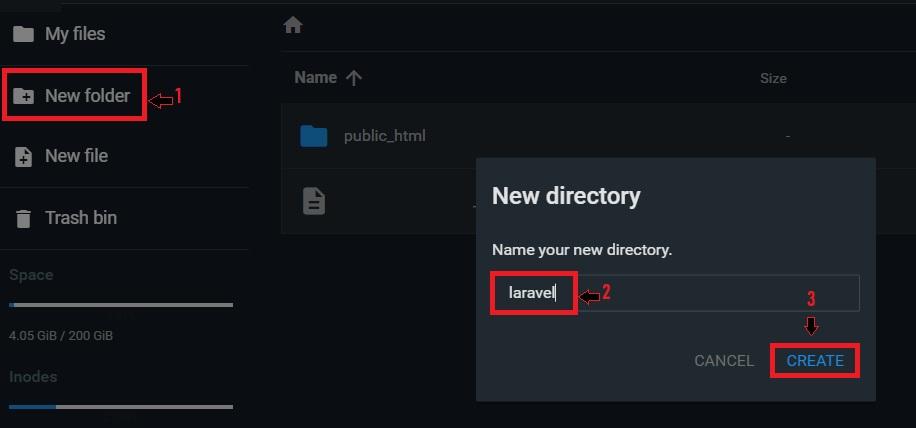
This is where you’ll later install the Laravel PHP framework.
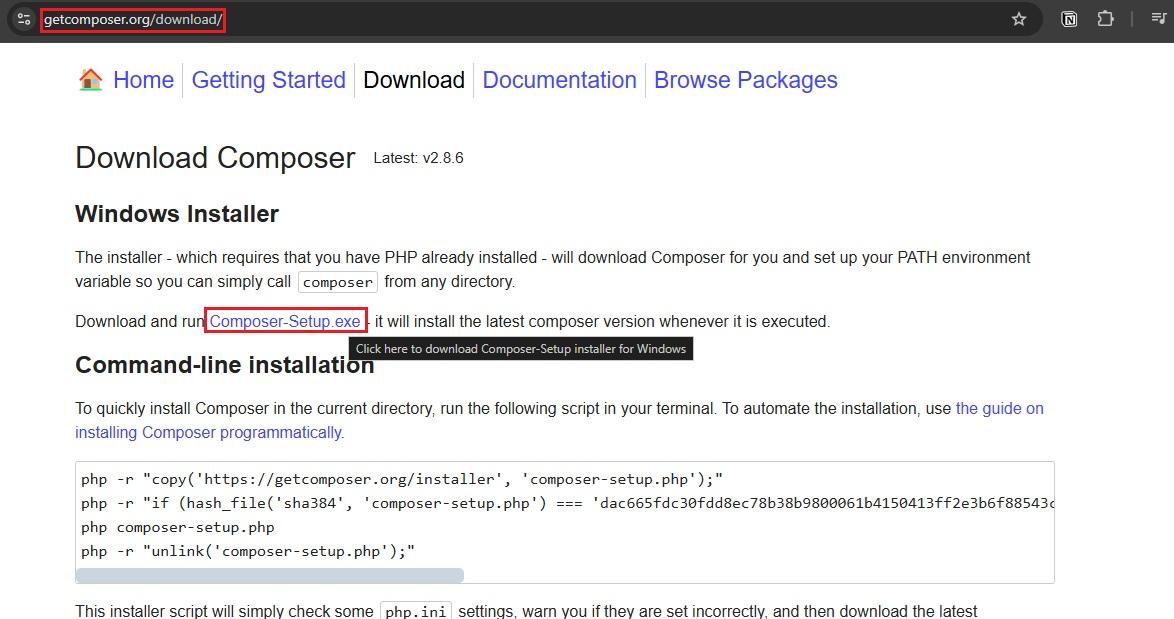
3. Install Composer
Installing Laravel requires a PHP package manager called Composer. If you don’t already have it, point your browser to getcomposer.org.
From there, click Download and follow the instructions to add Composer to your server.
4. Install Laravel
Next, open your terminal or command prompt.
When you’ve done that, open your terminal or command prompt and navigate to the Laravel subdirectory you created in step 2.
Now, using Composer, run the following command:
composer create-project –prefer-dist laravel/laravel .
This will install a fresh Laravel project into the Laravel folder.
5. Set Up Your Environment Configuration
With Laravel installed, look in its subdirectory for a file called .env.example and create a copy of it.
This creates the .env file that you’ll need to configure to set up essential elements like database connections and app settings.
After configuring .env, generate a new Laravel application key like so:
php artisan key:generate
This vital key is used to encrypt sensitive data like session information and cookies, resulting in a safer and more secure site.
5. Link Laravel with WordPress
Now that Laravel is installed in the subdirectory, we need to link it with WordPress.
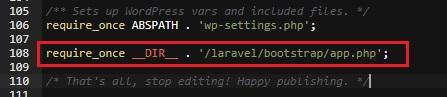
To do that, open your WordPress wp-config.php file located in the root directory.
Add the following line:
require_once __DIR__ . ‘/laravel/bootstrap/app.php’;
By doing this, you’re loading the app.php bootstrap file, establishing a connection between the two tools so that you can now take advantage of Laravel’s routing, database management, and other features directly from within WordPress.
6. Call Laravel Routes from WordPress
Once Laravel is linked to WordPress, you can start using Laravel’s routing and functionality to begin adding more advanced features to your site.
For example, you could handle complex tasks like creating custom forms and APIs or implementing a better structure to improve the way your site handles HTTP requests.

First, you need to create a route by adding the following to your routes/web.php file:
Route::get(‘/hello’, function () {
return ‘Hello from Laravel!’;
});
You can now call the Laravel route by using:
<?php
$response = app(‘router’)->dispatch(request());
echo $response->getContent();
?>
Once you’ve done that, WordPress can now access Laravel routes and display their output within your WordPress templates. For instance, you could call a custom Laravel route to fetch and display dynamic content or interact with an API.
In other words, you get added functionality with none of the usual drawbacks that come with plugins.
Post-Integration Testing: How to Make Sure it Worked
If you’ve followed the above steps to the letter, Laravel and WordPress should be working hand-in-hand, but, as with any major change to your WordPress platform, it never pays to take it for granted.
First, check that Laravel is installed properly by typing in your domain name followed by your Laravel sub-directory, for example: yourwebsite.com/Laravel.
If you’ve done this right, you should now see the Laravel welcome screen. If not, you may need to check out the framework’s documentation to figure out what went wrong and correct course.
Next, test if routes are working by creating a basic route in the routes/web.php file like so:
Route::get(‘/test-laravel’, function () {
return ‘Laravel is working!’;
});
With that done, go to http://yourdomain.com/laravel/test-laravel in your browser. You should see the message “Laravel is working!”.
If it does, give yourself a pat on the back for a successful Laravel-WP integration.
Integrating Laravel with WordPress: Key Takeaways
A WordPress-Laravel integration opens up a plethora of opportunities to improve everything from the way you work to the end products you deliver.
Still, it goes without saying that making a move as big as this one can be a little intimidating, so we’re glad you checked out this guide. If you’ve followed the steps above, we hope they’ve helped you get your head around what could seem like a challenging task.
As you go forward and begin transforming WordPress with a Laravel PHP framework, keep in mind the following key takeaways:
- Laravel gives WordPress new capabilities without plugins – Whether it’s better use of API, higher template customizations, or upgraded security, Laravel introduces features that WordPress doesn’t offer out of the box. As a result, you get more tools and better functionality without relying on plugins which could affect your performance or even create a site-paralysing conflict.
- Integrating the two platforms can be straightforward – At its most basic, the process involves installing and configuring the Laravel framework, then linking it with WordPress by adding a line to your wp-config file.
- Be sure to test that everything worked – Even if you’re an experienced developer, mistakes happen to the best of us. Remember to test that the integration was successful by following the instructions in this guide.
Looking for more ways to improve the way you work with the web’s leading CMS? Check out our top 12 WordPress tools for developers