WPLift is supported by its audience. When you purchase through links on our site, we may earn an affiliate commission.
How to Create a Lead Capture Form in WordPress

Lead generation is the backbone of any successful marketing strategy. Capturing leads is key to growing your business, whether you’re building an email list, gathering data from potential customers, or tracking interest in your services.
WordPress users can access a wide range of plugins and tools for creating lead capture forms. This article shows a few different ways to make a custom lead generation form for your site.
Here are some types of lead capture forms you might want to add to your site:
- Newsletter Signup Forms: Grow your email list by inviting users to subscribe to updates.
- Free Download or Resource Forms: Offer an e-book, guide, or checklist in exchange for their information.
- Event Registration Forms: Use these for webinars, conferences, or other events to gather attendee details.
- Feedback or Survey Forms: Collect user opinions to improve your offerings or customer experience.
The first two options listed above are the most common. In both cases, growing your email list is the goal. Leads are automatically added to your email list when they submit the form.
Options for Adding a Lead Capture Form to Your WordPress Website
Let’s look at three ways to add lead generation forms to your site.
1. Embed a Form Created with Your ESP
Most Email Service Providers (ESPs), like Mailchimp or Kit (formerly ConvertKit), allow you to create customizable lead capture forms. You can add these forms to your site by placing a code snippet onto the page or via a WordPress plugin (if the ESP offers one).
For this article, we’ll work with Kit as an example. They offer a free plan that supports up to 10,000 subscribers, so you can try it at no cost. The process is similar for other ESPs, so you should be able to follow along even if you use a different one.
Creating a Lead Capture Form with Kit
First, log in to your Kit account (or create a new account if you don’t already have one).
Next, from the Kit dashboard, go to Grow > Landing Pages and Forms.
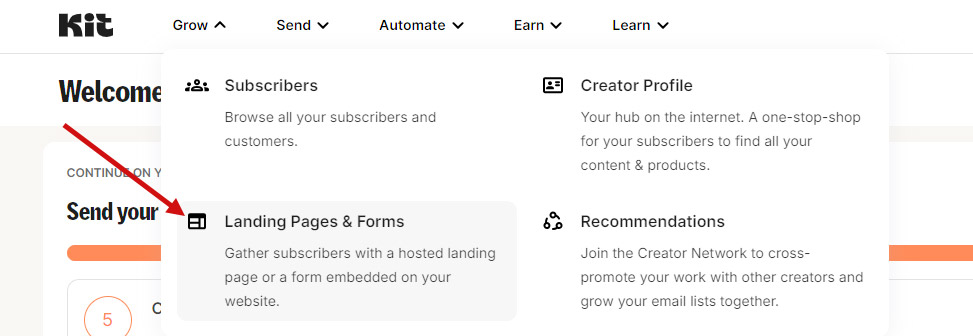
We’ll use a form for this example, but the process of creating a landing page is very similar.
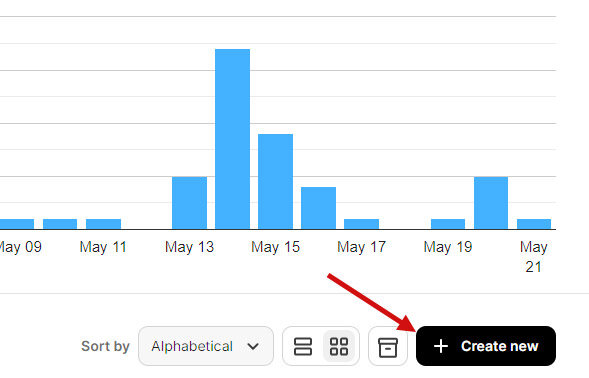
Then, click on the “create new” button.
Next, select the type of form you want to create. For this example, I will create an inline form, which can be added to a WordPress page or post.

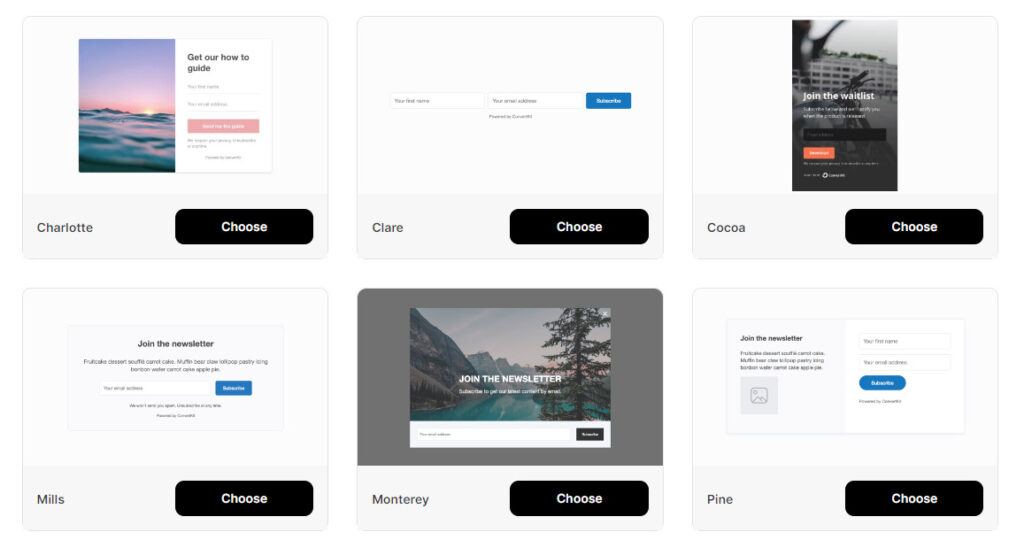
Kit offers a selection of templates to use as the starting point for your form. Select one that suits your needs.
Now, you’re in the form builder where you can customize your form. You can click on the text to select it, delete the filler text, and enter your custom text. You can also change the color of selected text. On the right, you’ll find the general settings. Here, you can change the background color or add a background image.
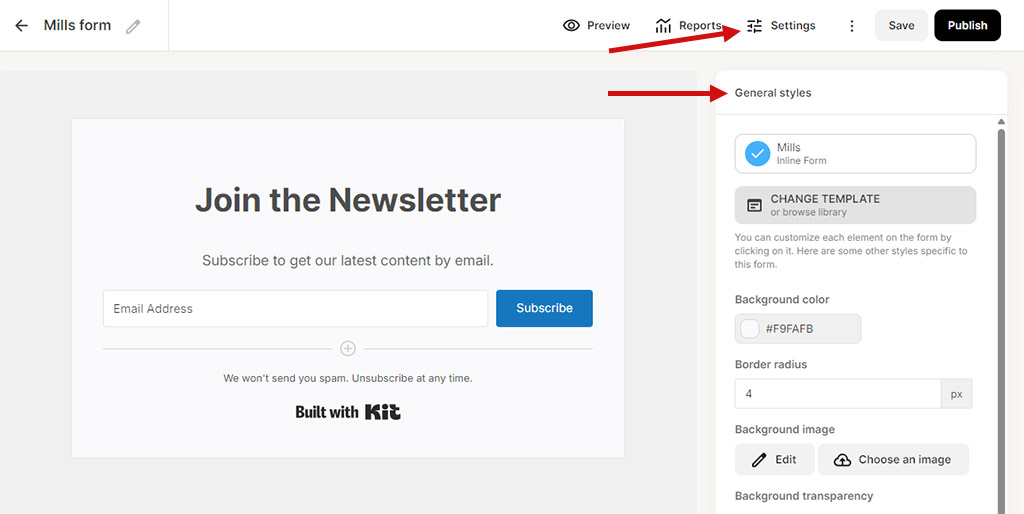
If you click on “settings” above the form, you’ll see additional options. For example, you can customize the message users will see after they complete the form.

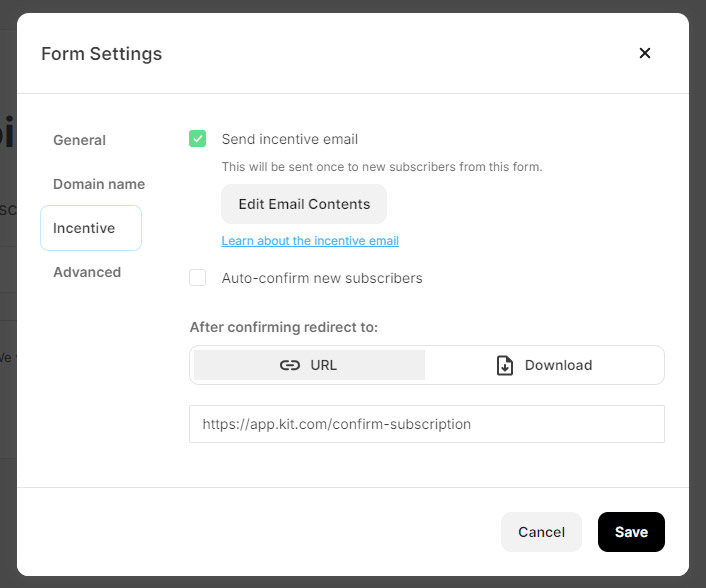
If you’re using a lead magnet (a free resource you offer to entice new subscribers), click on “incentive.” Here you can customize the welcome email that subscribers will receive. You can also upload the lead magnet, like a PDF, or set a landing page to send users after confirming their subscription.
When you’re done creating your form, click the “publish” button. Kit will show several options for adding the form to your site.
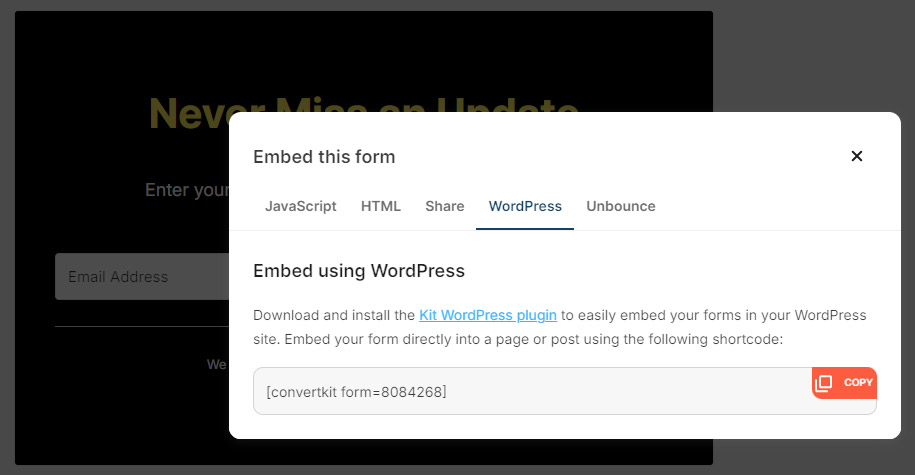
For WordPress users, Kit’s WordPress plugin is the easiest option, so that’s what I’ll demonstrate here.
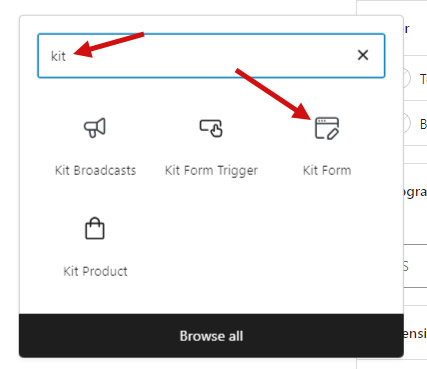
With the plugin installed and active on your site, open the page or post where you want to add the form. Click the “+” icon to add a new block, type “kit,” and select the “Kit Form” block.
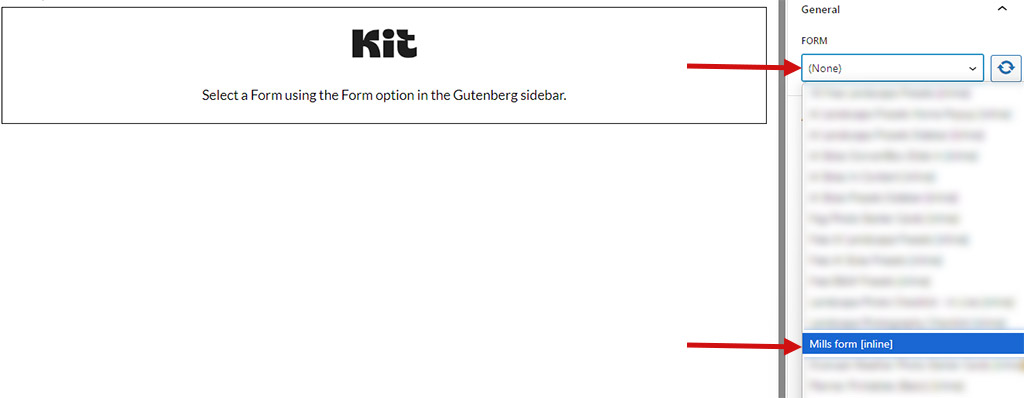
With the block selected, use the dropdown in the sidebar to select the form you want to add.
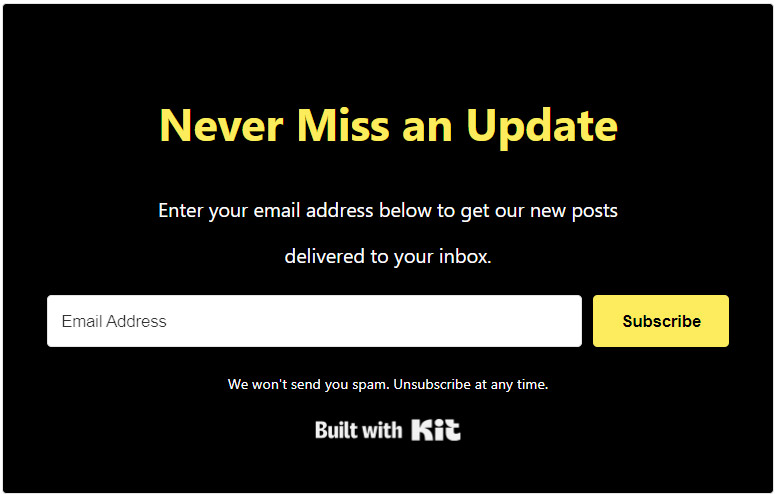
Now, when you update or publish the page, the working lead capture form will be included. A screenshot of my example is below.
If you’re using a different ESP, the process is very similar. Log in to your account and find the form builder. Once you finish the form, they’ll give you steps to add it to your site. If there’s no WordPress plugin, you can add the code manually. Just use a “Custom HTML” block in the WordPress editor and paste your code there. Follow the ESP’s instructions to ensure the form shows up and works properly.
2. Create an Opt-in Form with a WordPress Plugin
The next option is to use a WordPress plugin created for lead generation. These plugins connect directly to your ESP. So, when subscribers fill out the form, they are automatically added to your email list.
Choose the Right Plugin or Tool
Finding the right plugin starts with understanding your requirements. Here’s what to consider:
- Integration: Ensure the plugin works seamlessly with your ESP (e.g., Kit, Mailchimp).
- Ease of Use: Look for drag-and-drop builders or easy customization options.
- Features: Customizable fields, multi-step forms, and advanced styling options may be necessary, depending on the type of form you need.
If your ESP doesn’t directly integrate with plugins, consider using Zapier. This platform bridges the gap between tools, connecting your form with your ESP.
Top WordPress Lead Capture Tools
Here are a few of the most popular lead capture options for WordPress users:
- OptinMonster: A powerful lead generation tool with advanced targeting and customization options.
- Thrive Leads: Feature-rich with A/B testing and smart targeting.
- Convert Pro: A lightweight plugin with customizable opt-in forms.
- Elementor Pro: The popular page builder includes form creation options.
The process of creating and embedding a form varies depending on which plugin you choose. All of the options listed above provide thorough documentation.
3. Creating an Opt-in Form with Kadence Blocks
The third option we’ll discuss is using the free Kadence Blocks plugin. Some page builder plugins, like Elementor, have opt-in form builders. But you need to upgrade to a paid plan to use them. Kadence stands out by including it in the free plugin.
Here’s how to create an opt-in form with Kadence Blocks and integrate it with Kit (or your ESP of choice).
First, install and activate Kadence Blocks.
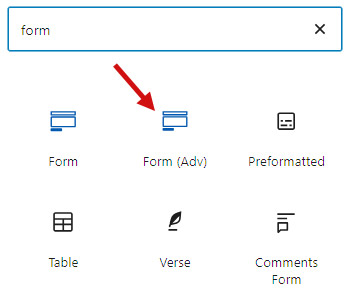
Next, open the page or post where you want to add the form. Add a “Form (Adv)” block.
You should see an element like the one in the screenshot below. Click on “create new.”

Select the type of form you want. I’ll select “subscribe” for this example.

Next, select your preferred style.

Then, give your form a title and description.

Now, you can edit the form’s style in the right sidebar. You can also set it to integrate with your ESP. To do this, click the dropdown under “submit actions.”
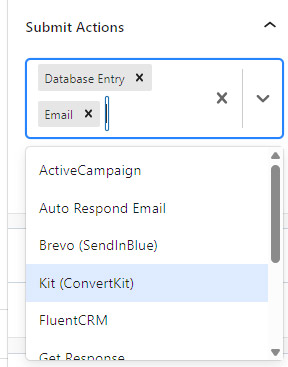
Next, you’ll enter your API key from your ESP. You can find your API key in the account settings of your ESP’s dashboard. Contact the ESP if you need assistance.
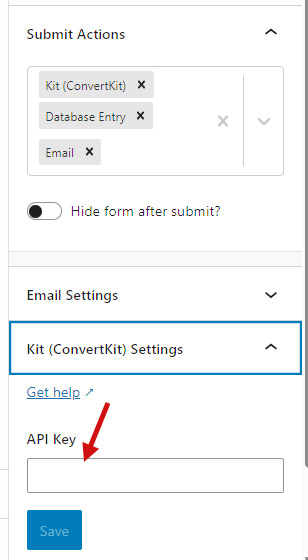
Depending on your ESP, you may see additional options after entering your API key. For example, if you’re using Kit, you’ll see a dropdown to select the form you want to use.
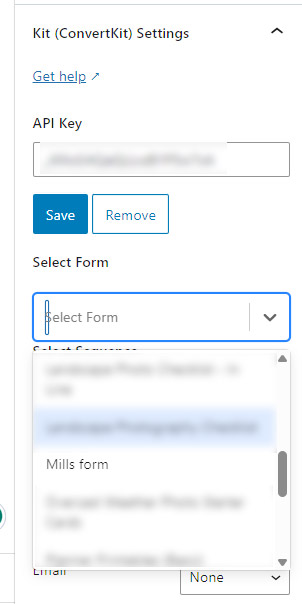
That’s it! After you publish or update the page, you’ll have a working lead generation form.
Frequently Asked Questions
Do I need coding experience to create a lead capture form in WordPress?
No! Many email service providers (ESPs) make it simple to create forms for WordPress pages and posts. Using a lead generation plugin is another option that doesn’t require coding.
Can I customize my lead capture forms to match my website design?
Yes. Most form builders and plugins allow you to change details like colors.
What’s the best way to encourage users to complete a lead capture form?
Offer an incentive like a free resource. Additionally, keep your forms short and don’t require any more information than necessary. Also, include a clear call to action.
Are lead capture forms mobile-friendly?
Yes. All the options in this article create forms that work on both desktops and mobile devices.
