WPLift is supported by its audience. When you purchase through links on our site, we may earn an affiliate commission.
How to Create WordPress Custom Widget Programmatically: A Developer’s Guide
Building a custom WordPress widget may not be the only way to display live business metrics on your website, but it’s certainly one of the most efficient.
Look at it this way:
If you don’t use a widget, the best alternative is to use a plugin.
Now, even if you ignore the time it takes to research and test a suitable plugin, you can’t ignore the fact that plugins can slow down your website and pose added security risks, especially if they’re abandoned by their developer.
That’s not to mention the limitations on API requests imposed by some third-party tools that can make it harder to truly scale your platform.
So, no matter how you look at it, a widget is a more secure, scalable, and performance-friendly long-term solution.
In this guide, we’ll show you how to make one. Below, you’ll discover:
- Step-by-step instructions to create a live business metrics widget
- Best practices for structuring WordPress widgets
- How to optimize your widget for maximum security and efficiency.
Ready to get started?
Let’s get to it.
What are WordPress Widgets and How Do They Work?
WordPress widgets are essentially modular blocks that display content. Unlike regular blocks used to create posts and pages, widget blocks are typically used to add dynamic elements in a website’s sidebar or footer.
Behind the scenes, they can also be used to display pertinent information on your WordPress dashboard.
Unlike plugins, which can often become bloated with code and features superfluous to the task at hand, widgets get right to the point, featuring only what’s absolutely necessary to display a particular type of content.
As you can imagine, this makes them a lighter and quicker way to add extra functionality to your site.
Of course, if you’re going to hand-craft your own widget from scratch, it helps to know how they work.
Let’s take a look:
How WordPress Widgets Work
Widgets are created and managed using the WP_Widget, which serves as the solid foundation for any and all widgets you use. This class makes it possible for developers to define how the widget is displayed, what settings it includes, and how it handles user inputs.
To create one of your own, you need to define the following four functions:
- _construct() – Initializes the widget and sets its properties.
- widget() – Defines what the widget displays on the front end.
- form()– Creates the widget’s settings form in the WordPress admin.
- update() – Handles saving and updating widget settings.
For example, say you wanted to create a basic widget that displays real-time sales data from WooCommerce on your main WordPress dashboard.
Here’s what you’d do:
How to Create a Basic WordPress Widget: Step-by-Step
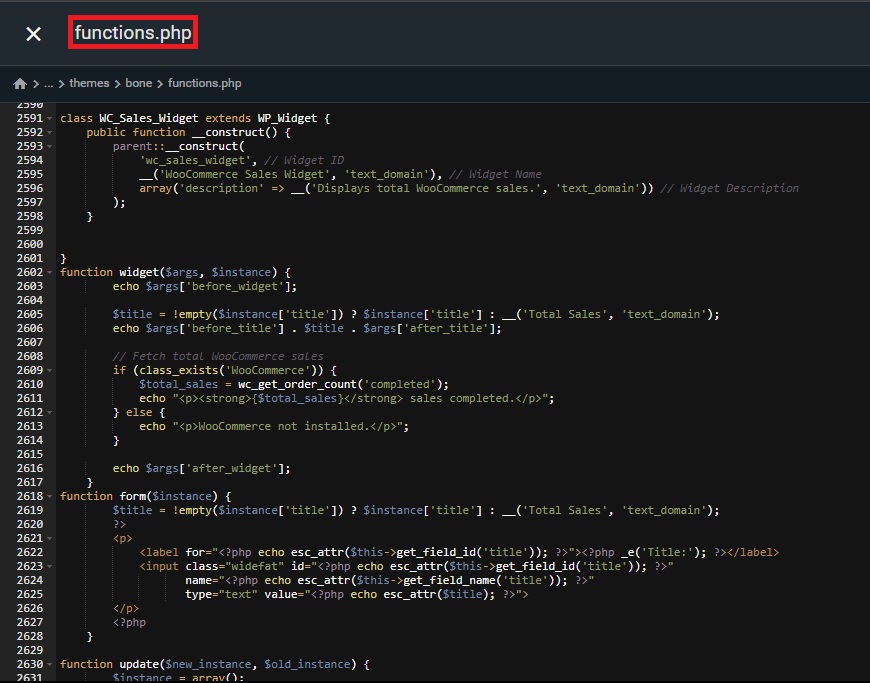
Creating a custom widget in WordPress begins with adding code to your theme’s functions.php file, as illustrated in the screenshot below.
Not sure what all that means?
Let’s break it down, step-by-step.
1. Define the Base Class
First, open up your theme’s functions.php file and add the following line:
class WC_Sales_Widget extends WP_Widget {
Here, WC_Sales_Widget is the custom class you’re defining for your new custom widget. Meanwhile, WP_Widget is the parent class provided by WordPress that gives your widget basic functionality.
By starting with this, you’re saying that the WC_Sales_Widget should inherit all the properties of its parent class so that it can function as a widget.
2. Define Key Properties
From there, et the widget’s name, ID description using the __construct function like so:
function __construct() {
parent::__construct(
‘wc_sales_widget’, // Widget ID
__(‘WooCommerce Sales Widget’, ‘text_domain’), // Widget Name
array(‘description’ => __(‘Displays total WooCommerce sales.’, ‘text_domain’)) // Widget Description
);
}
}
3. Display the Data
Next, set the data to be displayed on your dashboard. In our example, that would look something like this:
function widget($args, $instance) {
echo $args[‘before_widget’];
$title = !empty($instance[‘title’]) ? $instance[‘title’] : __(‘Total Sales’, ‘text_domain’);
echo $args[‘before_title’] . $title . $args[‘after_title’];
// Fetch total WooCommerce sales
if (class_exists(‘WooCommerce’)) {
$total_sales = wc_get_order_count(‘completed’);
echo “<p><strong>{$total_sales}</strong> sales completed.</p>”;
} else {
echo “<p>WooCommerce not installed.</p>”;
}
echo $args[‘after_widget’];
}
4. Allow Front-End Customization
You probably don’t want to manually alter your code every time you want to customize your new widget. So to make it easier, use the _form() function to create a settings form in the WordPress admin panel so that you can customize the widget’s appearance and behavior without touching the code.
You can add it using code like this:
function form($instance) {
$title = !empty($instance[‘title’]) ? $instance[‘title’] : __(‘Total Sales’, ‘text_domain’);
?>
<p>
<label for=”<?php echo esc_attr($this->get_field_id(‘title’)); ?>”><?php _e(‘Title:’); ?></label>
<input class=”widefat” id=”<?php echo esc_attr($this->get_field_id(‘title’)); ?>”
name=”<?php echo esc_attr($this->get_field_name(‘title’)); ?>”
type=”text” value=”<?php echo esc_attr($title); ?>”>
</p>
<?php
}
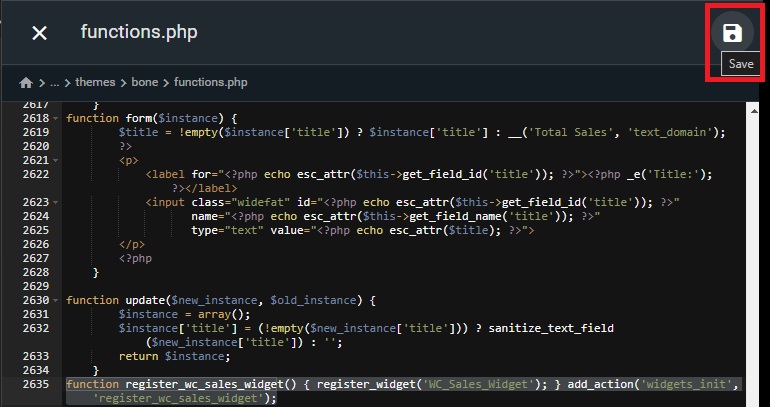
5. Enable Updates to Be Saved
To save those front-end customizations and updates, use the _update() function like so:
function update($new_instance, $old_instance) {
$instance = array();
$instance[‘title’] = (!empty($new_instance[‘title’])) ? sanitize_text_field($new_instance[‘title’]) : ”;
return $instance;
}
6. Register Your Widget
Finally, register your widget with WordPress using the following:
function register_wc_sales_widget() { register_widget(‘WC_Sales_Widget’); } add_action(‘widgets_init’, ‘register_wc_sales_widget’);
When you’re done, save your functions.php file.
You’ll now have a widget you can add to your WordPress dashboard that not only displays the total number of completed WooCommerce orders but also adds a basic settings form to your admin so that you can change the name of your widget.
Fetching Live Business Metrics: API & Database Integration
OK, so you’ve built a basic widget that’s ready to display data, but how exactly do you get that data?
Ultimately, that depends on whether its source is internal (within your website), or external (hosted by a third-party).
Let us explain:
1. Pulling Real-Time Data from External APIs
Say you wanted a custom widget that displays specific Google Analytics metrics or customer behavior data from your Customer Relationship Management (CRM) platform.
Those are third-party services hosted and managed outside of your WordPress site. So, to get data from them, you’d need to use an API, which is an interface that allows two independently-hosted systems to talk to one another.
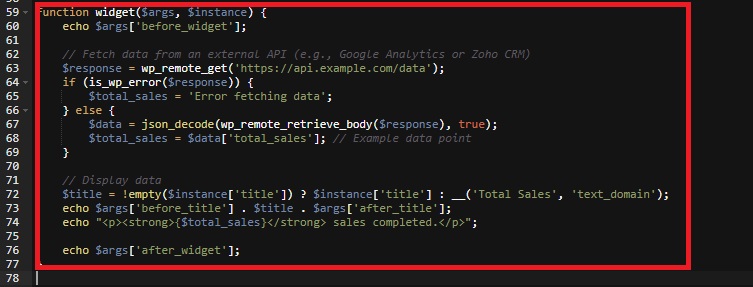
To do that, you integrate an API request into your widget using the WordPress wp_remote_get() function, something like this:
function widget($args, $instance) {
echo $args[‘before_widget’];
// Fetch data from an external API (e.g., Google Analytics or Zoho CRM)
$response = wp_remote_get(‘https://api.example.com/data’);
if (is_wp_error($response)) {
$total_sales = ‘Error fetching data’;
} else {
$data = json_decode(wp_remote_retrieve_body($response), true);
$total_sales = $data[‘total_sales’]; // Example data point
}
// Display data
$title = !empty($instance[‘title’]) ? $instance[‘title’] : __(‘Total Sales’, ‘text_domain’);
echo $args[‘before_title’] . $title . $args[‘after_title’];
echo “<p><strong>{$total_sales}</strong> sales completed.</p>”;
echo $args[‘after_widget’];
}
This sends a GET request to the API endpoint (an address where the external service can be reached) and returns the response, ultimately allowing your widget to display live, up-to-date data pulled directly from the external service.
2. Querying the WordPress Database for Business Insights
Sure, external APIs are great for gathering insights, but WordPress itself stores a wealth of business metrics that can be just as valuable.
For example, WooCommerce sales and certain types of user activity are stored within the WordPress database. You can directly ask that database to give you the reveal event data for your widget by creating a database query.
While the WP_Query or get_posts()functions are typically used for standard database queries, for the kind of custom queries you want to create, you may find it more effective to use the $wpdb object like this:
global $wpdb;
$total_sales = $wpdb->get_var(“
SELECT COUNT(*)
FROM {$wpdb->prefix}posts
WHERE post_type = ‘shop_order’
AND post_status = ‘wc-completed’
“);
In this example, we’ve created a simple query that counts the number of completed WooCommerce orders by querying the posts table.
Here, the WHERE clause ensures that only orders marked as “completed” are counted, keeping the data clean and accurate.
Handling API Rate Limits and Caching Responses
One major downside to displaying data through a custom widget is that fetching said data is going to put a strain on your server resources.
This is arguably more true if you’re pulling from external sources, but even internal custom database queries require some degree of processing power.
As you can imagine, the more quests you make, the more resources that eat up and the more detrimental that is to your page load speeds.
The other drawback is that many external APIs impose rate limits, meaning you can only fetch data a certain number of times per minute or hour.
If you’re displaying frequently updated data in real-time, this is obviously a problem, though not one that can’t be solved.
How?
By caching API responses.
That way, you don’t need to request the same data over and over again in a short amount of time. That way, you avoid hitting those rate limits while also sending fewer requests and, thus, minimizing your widget’s impact on site performance.
You can cache API responses using the set_transient() function like so:
function widget($args, $instance) {
echo $args[‘before_widget’];
// Check for cached response
$cached_data = get_transient(‘api_data_cache’);
if ($cached_data === false) {
// No cached data, fetch new data
$response = wp_remote_get(‘https://api.example.com/data’);
if (is_wp_error($response)) {
$total_sales = ‘Error fetching data’;
} else {
$data = json_decode(wp_remote_retrieve_body($response), true);
$total_sales = $data[‘total_sales’];
// Cache the response for 1 hour
set_transient(‘api_data_cache’, $total_sales, 3600);
}
} else {
// Use cached data
$total_sales = $cached_data;
}
// Display the data
$title = !empty($instance[‘title’]) ? $instance[‘title’] : __(‘Total Sales’, ‘text_domain’);
echo $args[‘before_title’] . $title . $args[‘after_title’];
echo “<p><strong>{$total_sales}</strong> sales completed.</p>”;
echo $args[‘after_widget’];
}
This will store the API response for an and fetch fresh data only when the cache expires. It’s a simple yet effective way to manage rate limits and optimize performance.
Implementing Live Data Updates with AJAX & WebSockets
Let’s face it, in today’s 24/7 economy, old data can sometimes be almost as useless as no data.
To make the biggest impact, you need real-time stats, facts, and figures that can help you make critical decisions quickly.
Still constantly reloading your page to get the latest metrics isn’t exactly In today’s fast-paced digital world, having real-time data at your fingertips can make a significant impact, especially in business dashboards and analytics.
However, constantly reloading your page to view updated data isn’t exactly productive, nor does it lead to a positive user experience if you’re displaying data on your website’s public-facing front end.
That’s where AJAX (Asynchronous JavaScript and XML) and Web Sockets come in, letting you request data from the server without reloading the page.
Let’s look at both in turn:
1. Ajax
For example, let’s say you have a widget displaying the number of orders received in the past hour. Instead of manually refreshing the page to get the latest count, you can use AJAX to automatically fetch new data at specific intervals.
Here’s how it works:
Step-by-Step AJAX Implementation in WordPress Widgets
To implement AJAX in a WordPress widget, you’ll need to perform a few tasks:
1. Enqueue the AJAX Script
First, enqueue a JavaScript file that will handle the AJAX request like this:
function enqueue_widget_ajax_script() {
wp_enqueue_script(‘widget-ajax’, get_template_directory_uri() . ‘/js/widget-ajax.js’, array(‘jquery’), null, true);
wp_localize_script(‘widget-ajax’, ‘ajax_object’, array(‘ajax_url’ => admin_url(‘admin-ajax.php’)));
}
add_action(‘wp_enqueue_scripts’, ‘enqueue_widget_ajax_script’);
2. Create the JavaScript
Next, you need to create the actual javascript file.
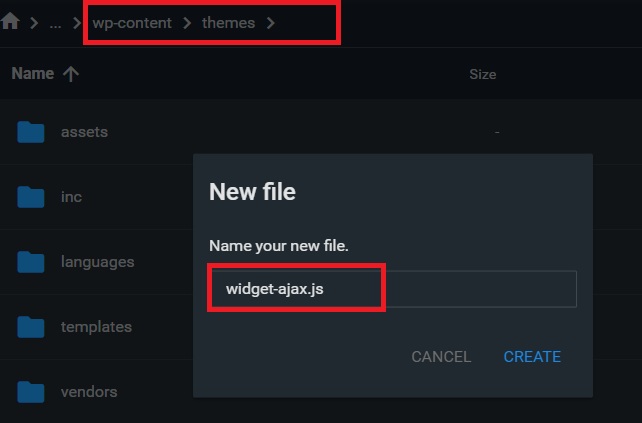
In the example above, we called our widget-ajax, so our file would be widget-ajax.js.
This is the file that will send an AJAX request to the server when needed and automatically update the widget with new data – no refresh required.
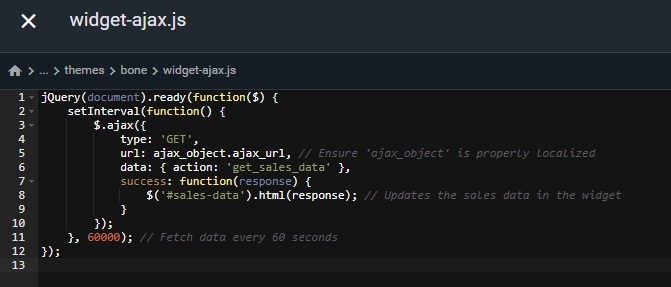
That file should include the following javascript code:
jQuery(document).ready(function($) {
setInterval(function() {
$.ajax({
type: ‘GET’,
url: ajax_object.ajax_url, // Ensure ‘ajax_object’ is properly localized
data: { action: ‘get_sales_data’ },
success: function(response) {
$(‘#sales-data’).html(response); // Updates the sales data in the widget
}
});
}, 60000); // Fetch data every 60 seconds
});
3. Create the PHP Handler for the AJAX Request
In your theme’s functions.php, create a function that will query the database or external API for the data and return it.
That should look like this:
function get_sales_data() {
global $wpdb;
$total_sales = $wpdb->get_var(“
SELECT COUNT(*)
FROM {$wpdb->prefix}posts
WHERE post_type = ‘shop_order’
AND post_status = ‘wc-completed’
“);
echo $total_sales;
wp_die(); // Required to terminate the request properly
}
add_action(‘wp_ajax_get_sales_data’, ‘get_sales_data’); // For logged-in users
add_action(‘wp_ajax_nopriv_get_sales_data’, ‘get_sales_data’); // For non-logged-in users
4. Display the Data in the Widget
In the widget() function of your widget, add a placeholder element for the dynamic data, such as:
function widget($args, $instance) {
echo $args[‘before_widget’];
echo $args[‘before_title’] . ‘Total Sales’ . $args[‘after_title’];
echo ‘<div id=”sales-data”></div>’; // Placeholder for sales data
echo $args[‘after_widget’];
}
2. Using WebSockets for Real-Time Updates
AJAX is a great solution if you’re only looking for updates every hour or so, but what if you need up-to-the-minute insights?
That’s when you use Websockets, which are a much better alternative for generating truly real-time updates with split-second accuracy.
This makes Websockets an ideal solution for things like displaying the latest sports scores during in-progress games, monitoring the impact of a live marketing webinar in real-time or displaying stock tickets.
How to Use Websockets
A number of useful third-party services are available that can simplify Websockets integrations into WordPress.
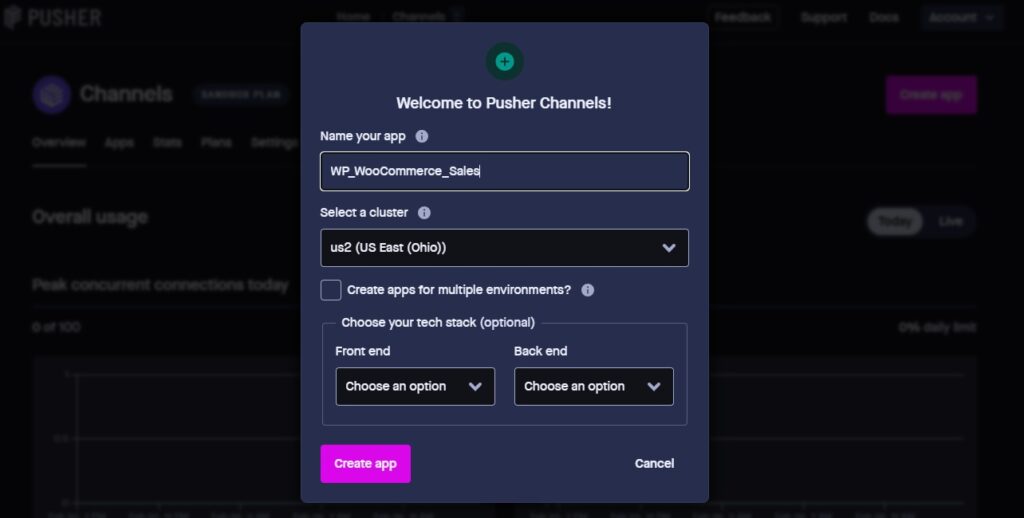
These include:
- Pusher – A simple service that’s best suited for beginners and small-scale applications.
- Firebase – A popular service that’s ideal for mobile and web apps.
Alternatively, you can also create your own WebSocket server to give yourself absolute full control over real-time communication between your widget and its datasource.
However, this requires a much more technical set-up and we don’t recommend attempting it unless you’re already an experienced developer with advanced knowledge of WebSocket protocols and server management.
Visualizing Business Metrics: Charts, Graphs & Tables
Raw numbers certainly have their place, but let’s be honest:
A big wall of text isn’t the most user-friendly way to digest data, is it?
To make that data more palatable and easier to understand, you may want to turn your raw data into a visually-appealing graph, chat, or table.
The good news is that there’s a lot of tools out there that can help you with that.
Source: Chart.js
Chart.js, for example, does an excellent job at turning your data into simple, lightweight charts.
Source: DataTables
Meanwhile, DataTables serves as a reliable go-to for interactive, sortable tables packed with search and pagination features.
Alternatively, you could also use Recharts, which is best suited for those of you working on React applications such as single-page applications (SPAs) or dashboards.
How to Add Data Visualization to Your Widget: Step-by-Step
In this example, we’ll be using Chart.js to create a simple yet actionable chart for our WooCommerce sales data.
1. Enqueue Chart.js
First, enqueue Chart.js by adding the following to your functions.php file.
function enqueue_chart_scripts() {
wp_enqueue_script(‘chart-js’, ‘https://cdn.jsdelivr.net/npm/chart.js’, array(), null, true);
}
add_action(‘wp_enqueue_scripts’, ‘enqueue_chart_scripts’);
2. Create Your JavaScript File
Now, create your widget’s JavaScript file. In this example, ours is called wc-sales-chart.js.
Once created, add the following code:
jQuery(document).ready(function($) {
$.ajax({
url: wcSalesAjax.ajax_url,
type: ‘POST’,
data: { action: ‘fetch_sales_chart_data’ },
success: function(response) {
let ctx = document.getElementById(‘salesChart’).getContext(‘2d’);
new Chart(ctx, {
type: ‘line’,
data: JSON.parse(response),
options: { responsive: true }
});
}
});
});
3. Process the AJAX Request
Assuming you want your charts to automatically refresh without reloading the page, add the following:
function fetch_sales_chart_data() {
global $wpdb;
$results = $wpdb->get_results(“
SELECT DATE(post_date) as date, COUNT(*) as sales
FROM {$wpdb->prefix}posts
WHERE post_type = ‘shop_order’
AND post_status = ‘wc-completed’
GROUP BY DATE(post_date)
ORDER BY post_date ASC
“);
$labels = [];
$data = [];
foreach ($results as $row) {
$labels[] = $row->date;
$data[] = $row->sales;
}
echo json_encode([
‘labels’ => $labels,
‘datasets’ => [[ ‘label’ => ‘Sales’, ‘data’ => $data, ‘borderColor’ => ‘#0073aa’, ‘fill’ => false ]]
]);
wp_die();
}
add_action(‘wp_ajax_fetch_sales_chart_data’, ‘fetch_sales_chart_data’);
add_action(‘wp_ajax_nopriv_fetch_sales_chart_data’, ‘fetch_sales_chart_data’);
Optimizing Data Visualization for Large Datasets
Fetching thousands of data points at once?
That’ll slow your widget to a crawl.
Here’s how to keep things running smoothly:
- Limit query results – Instead of pulling all data, fetch only the last 30 days of sales.
- Use caching – Store query results temporarily with transients to avoid constant database hits. The best way to do this is by using the set_transient() and get_transient() functions in WordPress.
- Lazy load charts –Set your charts to only render when the widget is visible. You can do this by using the Intersection Observer API or triggering chart rendering when the user scrolls to the widget’s position.
Performance & Security Best Practices
By the time you’ve reached this point, you should already have a dynamic, fully functioning, and visually interesting widget ready to deliver the data you need, when you need it.
But you’re not done quite yet.
After all, what’s the point in doing all that work if your widget eats up so many resources that page load speeds grind down to snail’s pace, or, worse, if it leaves your site vulnerable to an attack by data thieves?
To protect your valuable data and prevent it from slowing you down, we recommend:
1. Securing API Requests & Preventing Unauthorized Access
Exposing sensitive business data such as sales numbers or user activity to unauthorized users is a major risk that can lead to data breaches, and all of the financial and reputational damage that goes along with them.
So, it’s essential that you do all you can to stop that data from falling into the wrong hands.
One effective way to do this is to apply a Nonce (number used once) to your AJAX requests. This validates API requests, ensuring only legitimate users or authorized requests can access or modify the data.
Here’s an example of how this might look:
function my_secure_ajax_script() {
wp_localize_script(‘my-widget-js’, ‘myWidgetAjax’, [
‘ajax_url’ => admin_url(‘admin-ajax.php’),
‘nonce’ => wp_create_nonce(‘secure_widget_nonce’)
]);
}
add_action(‘wp_enqueue_scripts’, ‘my_secure_ajax_script’);
Once you’ve done that, add the following to verify the nonce in your AJAX ___.
function fetch_secure_data() {
check_ajax_referer(‘secure_widget_nonce’, ‘nonce’); // Verify the nonce
if (!current_user_can(‘manage_options’)) { // Restrict access if needed
wp_send_json_error(‘Unauthorized’, 403);
}
// Fetch and return data
wp_send_json_success([‘message’ => ‘Success!’]);
}
add_action(‘wp_ajax_fetch_secure_data’, ‘fetch_secure_data’);
2. Restrict API Keys to Specific Domains
Using external APIs?
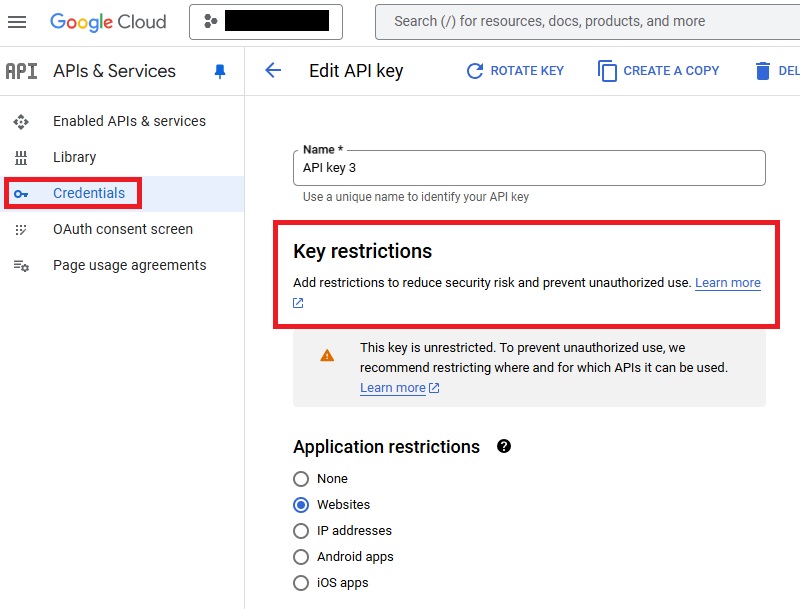
Whether it’s Google Analytics, Stripe, a CRM or any other platform, use that provider’s settings to ensure API keys are fully restricted to your domain and your domain only.
That way, there’s no chance that bad actors can access your API or misuse your credentials.
3. Use Server-to-Server Authentication for Sensitive Data
If an API key is restricted to your domain, it can still be exposed in your javascript files. To stop that from happening, make a server-side request in PHP and return only the needed data to JavaScript.
4. Handling Large Data Loads Efficiently
Large datasets can grind your widget to a halt if not handled properly. So, instead of loading 1,000+ rows in one go, break it into pages like so:
function fetch_paginated_orders() {
global $wpdb;
$page = isset($_POST[‘page’]) ? intval($_POST[‘page’]) : 1;
$limit = 10; // Show 10 orders per request
$offset = ($page – 1) * $limit;
$orders = $wpdb->get_results($wpdb->prepare(“
SELECT ID, post_date, post_status
FROM {$wpdb->prefix}posts
WHERE post_type = ‘shop_order’
ORDER BY post_date DESC
LIMIT %d OFFSET %d
“, $limit, $offset));
wp_send_json_success($orders);
}
add_action(‘wp_ajax_fetch_paginated_orders’, ‘fetch_paginated_orders’);
5. Implement Lazy Loading for Charts & Tables
Why load everything at once when nobody is even looking at it yet? Lazy loading ensures charts and tables only load when visible, ultimately improving your page load times and performance, making for a smoother user experience.
Here’s an example using the Intersection Observer API:
document.addEventListener(“DOMContentLoaded”, function () {
let chartSection = document.getElementById(“salesChartContainer”);
let observer = new IntersectionObserver(entries => {
entries.forEach(entry => {
if (entry.isIntersecting) {
loadChartData();
observer.disconnect(); // Stop observing once loaded
}
});
});
observer.observe(chartSection);
});
function loadChartData() {
// Fetch and render chart data
}
Do all that, and you’ll ensure your site remains fast and responsive, even when handling large datasets or complex widgets.
Deploying & Maintaining Custom WordPress Widgets
So, your new widget works great and is fully secure…
For now.
What if you later decide to change your WordPress theme and the widget no longer works?
What if you later deploy other plugins that come into conflict with your widget?
How will you ensure it doesn’t give up on you when future WordPress updates are rolled out?
Here, there’s a few best practices worth adhering to to really future-proof your widget for all possibilities.
1. Use Proper Hooks & Functions
First, take care to always enqueue scripts and styles using wp_enqueue_script() and wp_enque_style() functions. This will ensure proper loading order, prevent conflicts with other scripts, and help with performance optimization.
2. Give Your Widget a Unique Name
Add a unique name for your widget to avoid potential conflicts with other widgets or plugins. For example, my_custom_widget_enqueue_assets() instead of enqueue_assets()). This helps keep your code organized and ensures that your widget’s assets are uniquely identified..
3. Test With Multiple Themes and Plugins
Even if you’re not planning to introduce new themes and plugins right now, you don’t know for certain that this will always be the case.

So, before going live with your new widget, switch between different themes to check for any styling issues that need to be addressed.
Likewise, try enabling and disabling different plugins to catch any conflicts that need to be resolved.
3. Use Git for Version Control
If something goes wrong, it pays to have a good working version of your widget you can fall back on.
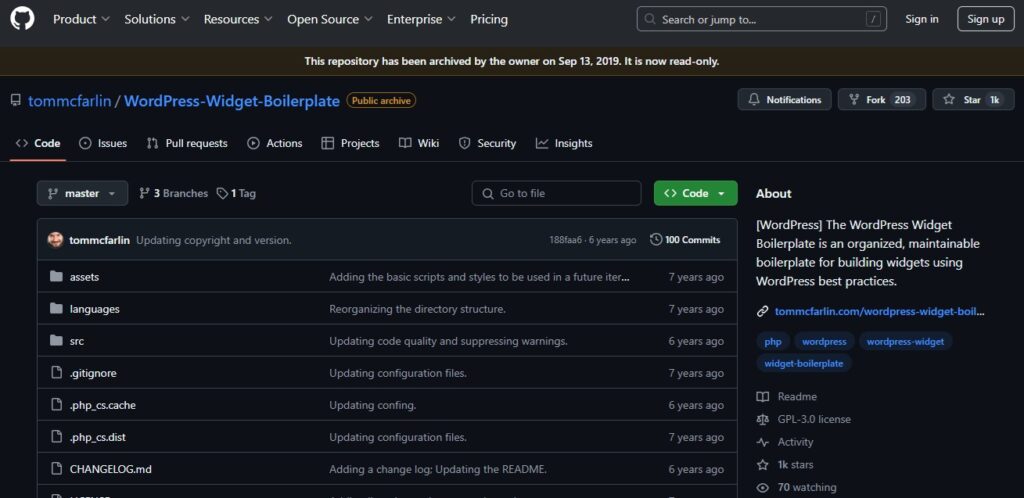
This is where Git proves invaluable, providing a simple yet effective way to save different versions of your widget so that you can quickly go back to a working copy.
You might want to consider using tools like WP Pusher to make it easy to push and pull versions to and from Git.
4. Use Composer for Third-Party Dependencies
If you’re using third-party tools and libraries to display your data, keep in mind that these may come with their own updates.
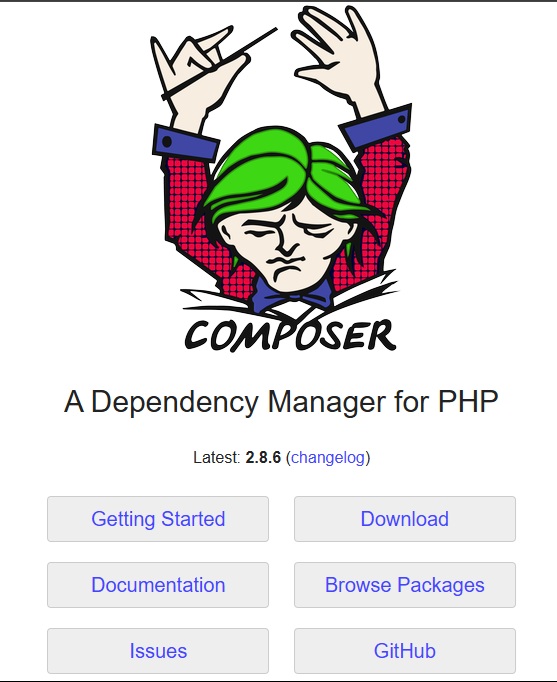
To manage them effectively, consider using Composer, a useful dependency management tool that helps you manage and install libraries and packages for your WordPress projects.
5. Test and Debug Everything
Finally, don’t forget to use WordPress’s in-built debug mode to test for errors.
For PHP problems, add the following code to wp-config.php
define(‘WP_DEBUG’, true);
define(‘WP_DEBUG_LOG’, true);
define(‘WP_DEBUG_DISPLAY’, false);
@ini_set(‘log_errors’, 1);
@ini_set(‘display_errors’, 0);
This will log any errors to your wp-content/debut.log file where you can review and begin to troubleshoot them..
Beyond WordPress itself, use your browser’s Developer Tools to test for errors in the JavaScript.
By doing all this, you’ll be able to quickly find and fix any issues, meaning your widget and your overall website both run smoothly with zero problems.
8. Case Study: Custom Widget for WooCommerce Sales Metrics
We recently spoke with a WooCommerce owner looking for a real-time sales dashboard they could use to track orders, revenue, and customer behavior directly from their WordPress dashboard.
Sure, there were plugins available, but they were either too bloated or simply lacked the flexibility to display data in a way that matched their business needs.
To solve that problem, they contracted a WordPress specialist to develop a custom widget that pulled sales data using the WooCommerce REST API.
The widget displayed key metrics like total revenue, recent orders, and best-selling products in an easy-to-read dashboard format.
Of course, there were challenges.
For example, the request limits imposed by WooCommerce restricted the number of API calls that could be made in a given timeframe, making it difficult -and occasionally impossible- for this large-scale store with high transaction volumes to always see the latest insights.
To get around that issue, the widget included transient caching to store sales data temporarily and reduce API calls.
Another problem related to the sheer size of the online store and its data. Querying from such large datasets created a major performance bottleneck, not only causing delays in real-time data updates, but negatively affecting overall site speeds.
To tackle those issues, queries were optimized to pull only the most essential data, while AJAX updates helped new data load automatically without a page refresh.
The result was a lightweight, high-performance sales tracking widget that provided real-time insights without slowing down WordPress.
The store owner could monitor sales instantly, make data-driven decisions, and improve their business operations, all from a clean, custom-built dashboard.
Building Custom WordPress Widgeets to Display LIve Business metrics: Key Takeaways for Developers
OK, so creating a custom WordPress widget to display live business metrics may not be the quickest WordPress task you’ll ever complete.
Still, compared to the endless hours you’d spend addressing the potential performance, security, and compatibility problems you’d get with a plugin, it’s time an efficient time-saver in the long-run.
What’s more, by customizing your own solution, you’re giving yourself full control over performance, data handling, and security, meaning you can truly tailor your widget to your precise business needs.
At least, you can if you remember to follow the best practices outlined in this guide, particularly:
- Custom WordPress Widget for Live Business MetricsOptimize for Fast and Smooth Data Updates – Use caching, asynchronous updates, and efficient database queries to prevent slowdowns.
- Safeguard Sensitive Business Data – Proper validation, authentication, and secure API connections will go a long way to protecting your valuable data.
- Use Visualization to Make Data User Friendly – The likes of Chart.js and DataTables help turn raw data into accessible insights, making it easy to make informed, data-driven decisions quickly.
When you’re done, why not learn how to create a custom WooCommerce dashboard you can add your new widget to?